IDE
PlatON Studio is an integrated development environment that helps developers quickly develop smart contracts. It also supports contract development, deployment and debugging on the Alaya Network and the PlatON Network.

Download#
The PlatON Studio installation package can be downloaded from Github Releases. Currently PlatON Studio supports macOS, Linux and Windows systems. Please download the corresponding version according to the system (for macOS, download .dmg or .zip; for Linux, download .AppImage; for Windows, download .exe), or click the link to directly download the installation package of the corresponding operating system:
- macOS: https://app.obsidians.io/platon/mac
- Linux: https://app.obsidians.io/platon/linux
- Windows: https://app.obsidians.io/platon/win
Installation#
- macOS: Double-click to open
PlatON-Studio-x.x.x.dmgand dragPlatON Studioto the application folder. - Linux: Double-click to open
PlatON-Studio-x.x.x.AppImage, select Properties => Permissions => Execute, and tick the Allow executing file as progrom option. Close the properties setting window and double-click to open the application (installation methods may vary for different Linux versions). - Windows: Double-click to open
PlatON-Studio-x.x.x.exe.
Feature Preview#
Preparation#
When PlatON Studio is installed correctly and started for the first time, you will see a welcome page with dependencies for PlatON Studio to run normally, including Docker, Alaya Node and Alaya Truffle.
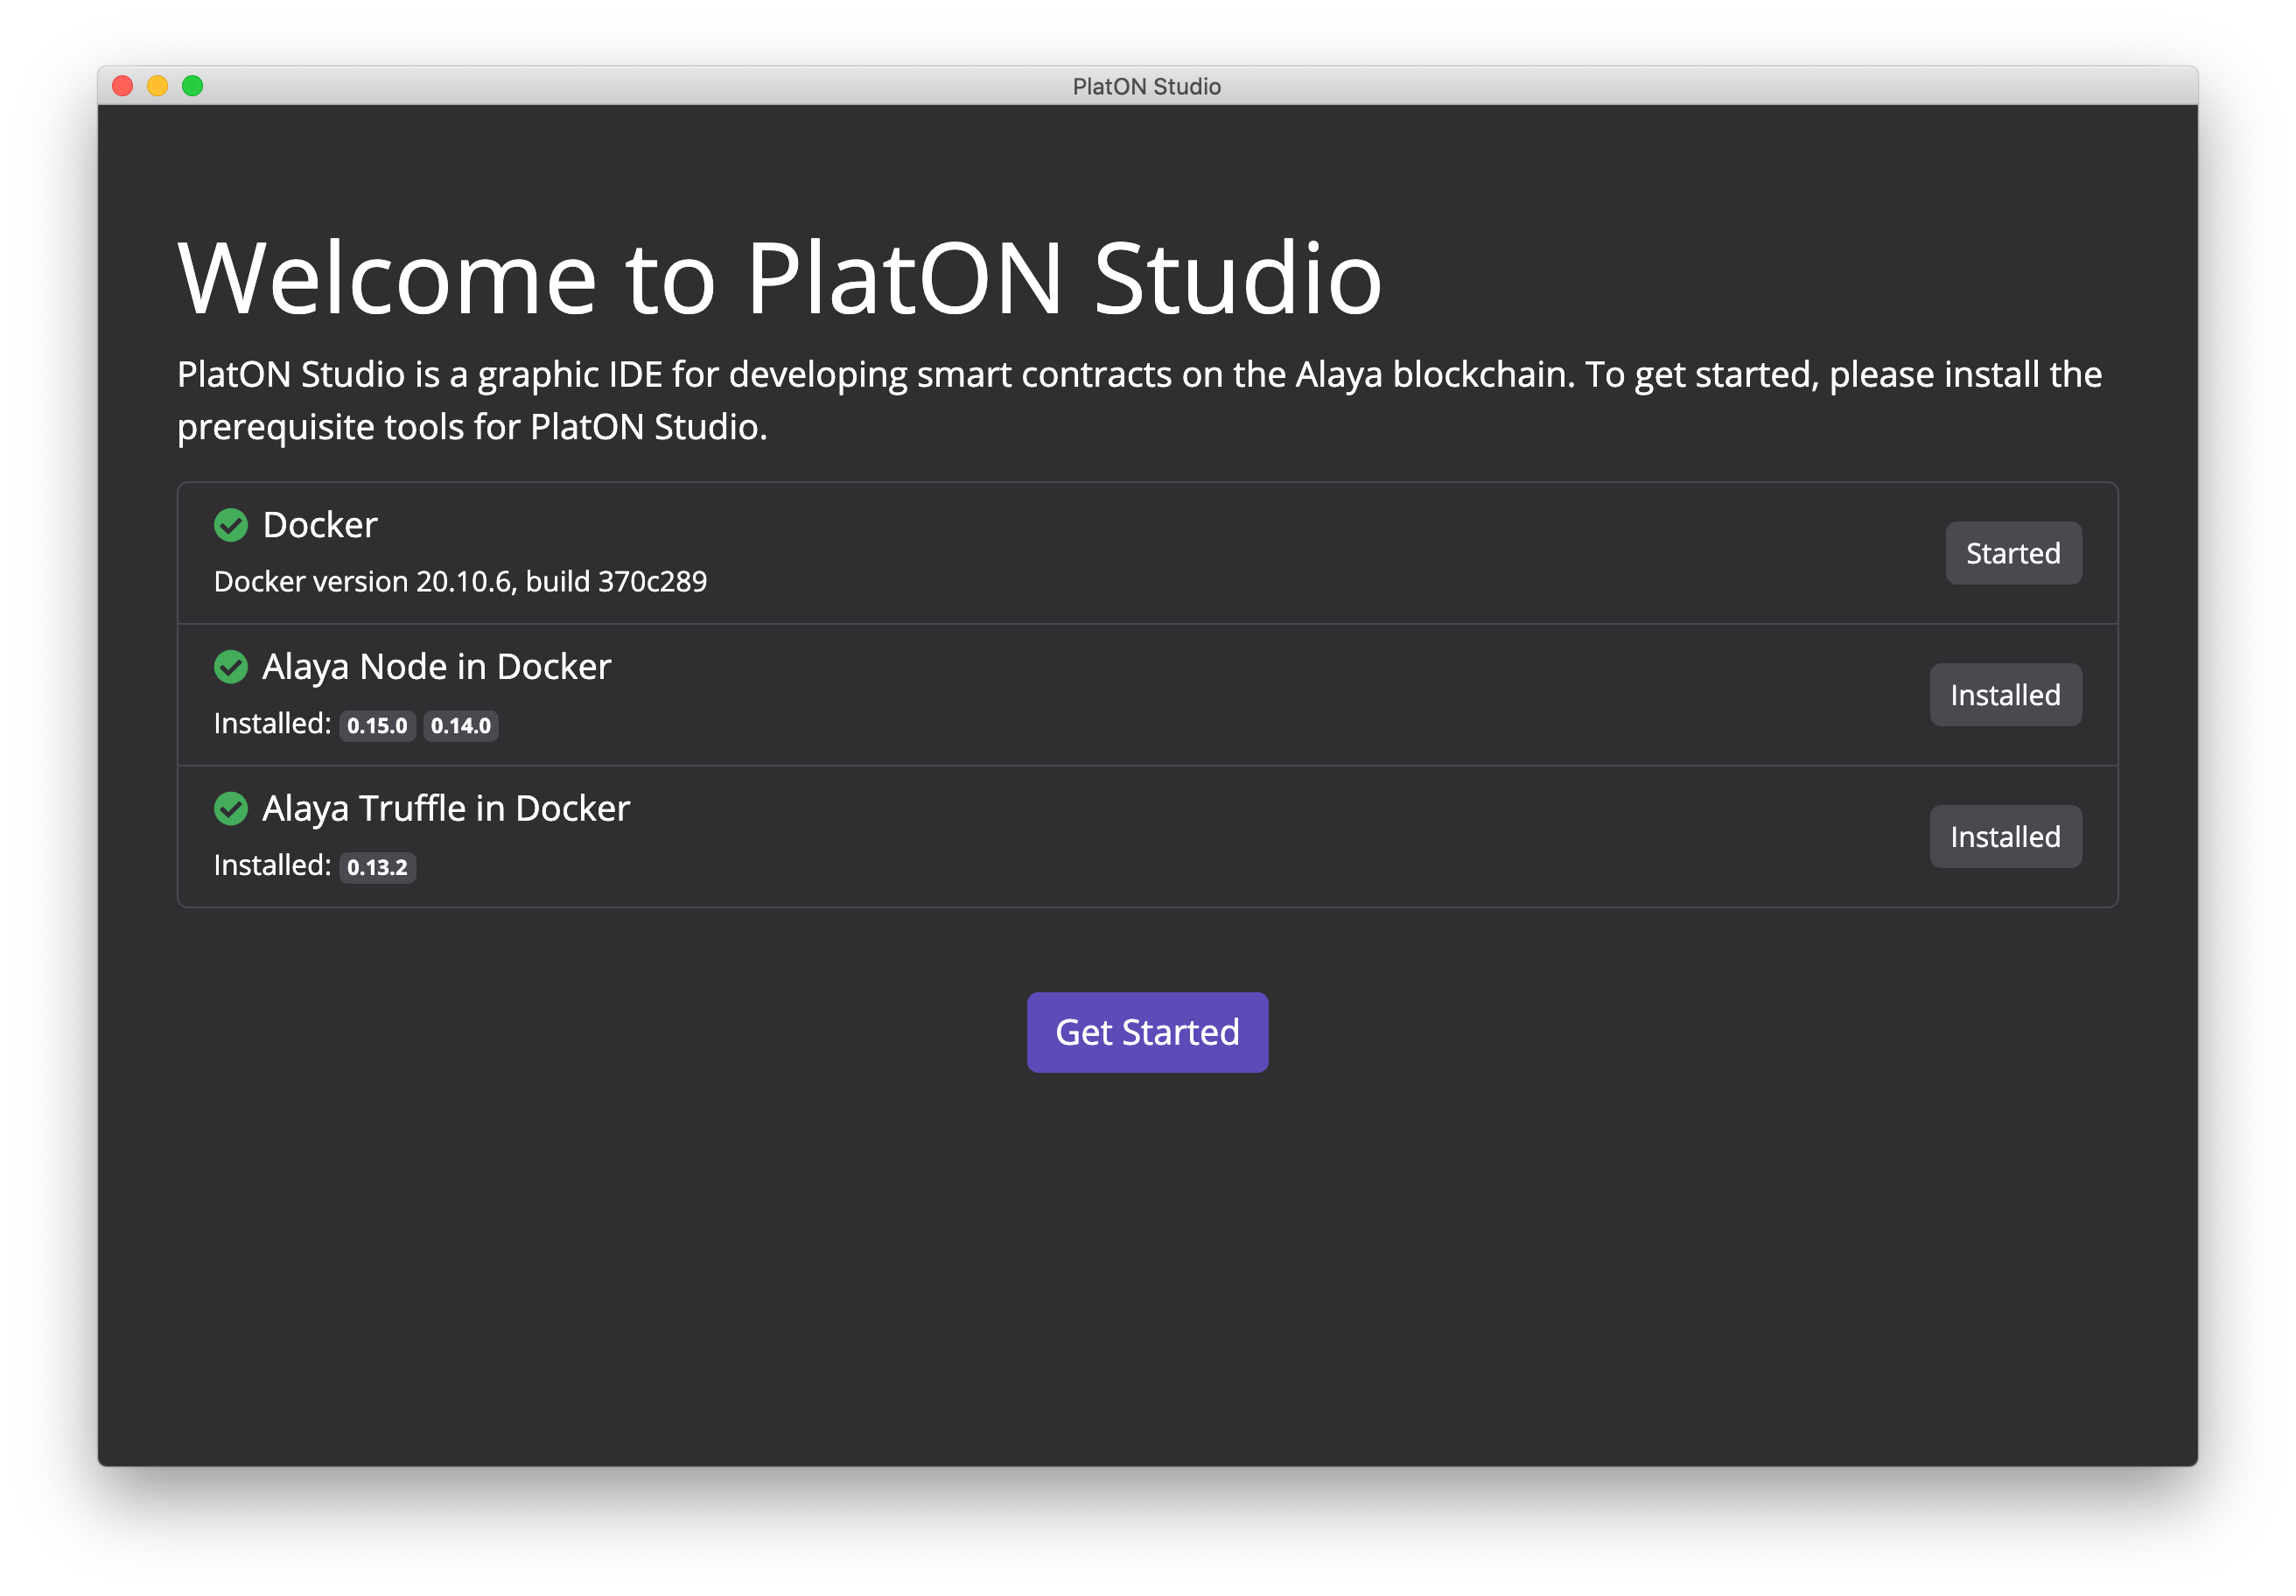
- PlatON Studio uses Docker to start the PlatON node and compile the project. If you have not installed Docker before, you can click the Install Docker button to visit the official Docker website and download and install it;
- Alaya Node in Docker is an Alaya node image, through which PlatON Studio runs Alaya nodes;
- Alaya Truffle in Docker is the Alaya version of Truffle, a toolkit for PlatON Studio to create and compile projects.
When all dependencies are properly installed and running, the gray Skip button will turn into a blue Get Started button. Click this button to enter the main interface of PlatON Studio.
Key manager#
After entering the main interface, we need to create some key pairs first. On any interface of PlatON Studio, click the key icon at the bottom left of the application to open the key manager.
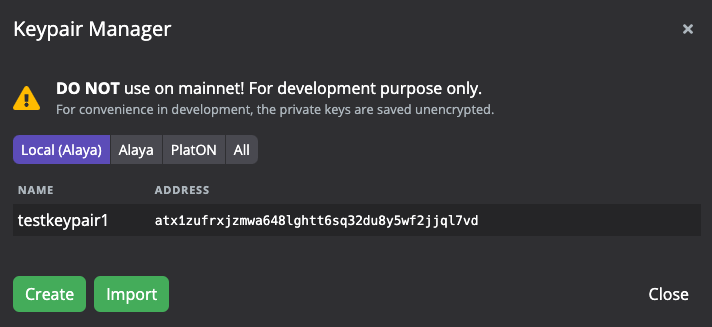
You can create, import and manage key pairs in the key manager. PlatON Studio supports the storage of key pairs in different address formats for PlatON, Alaya, and local development networks (respectively addresses starting with lat, atp ). When creating and importing a key pair, you can choose to create it in a private key or a mnemonic phrase. You can also set an alias for the key pair for identification in subsequent use.
In addition to storing and managing the key pair, the key manager will also provide the creation address for the genesis block. When creating a new local node instance, all addresses in the key manager will be used as the creation address. Before proceeding, please create some key pairs in the key manager as the creation address for node instances.
Local development node#
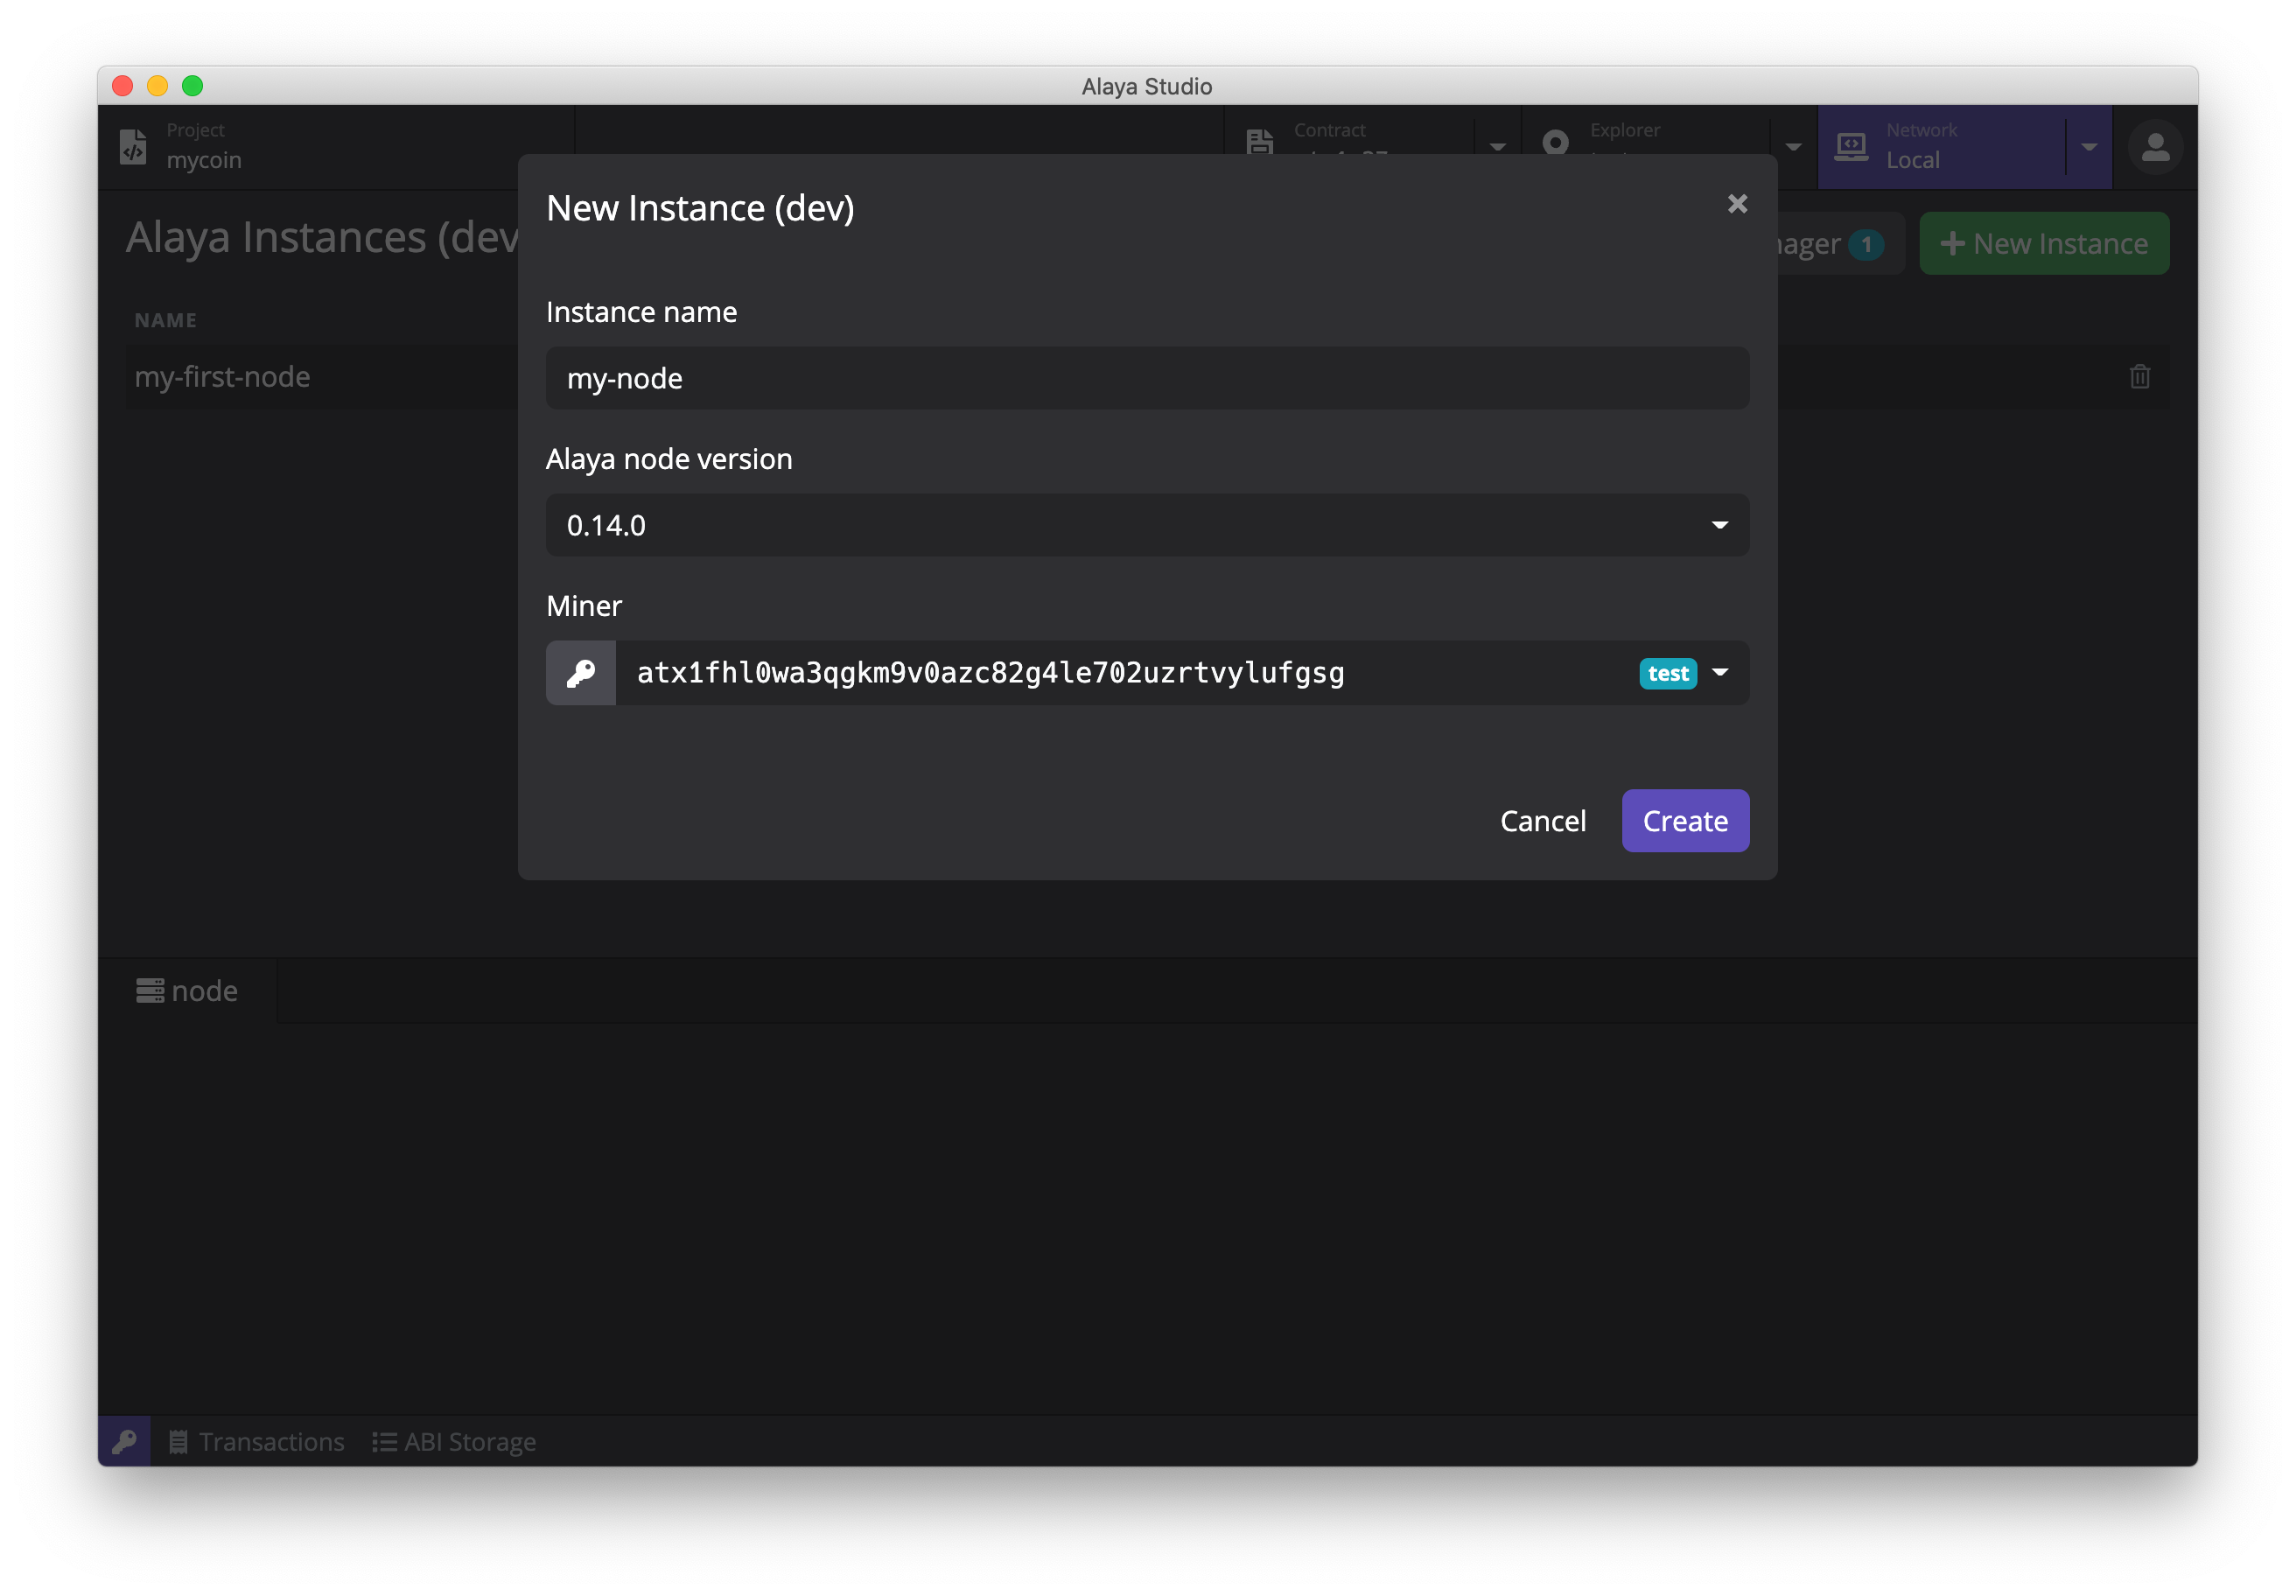
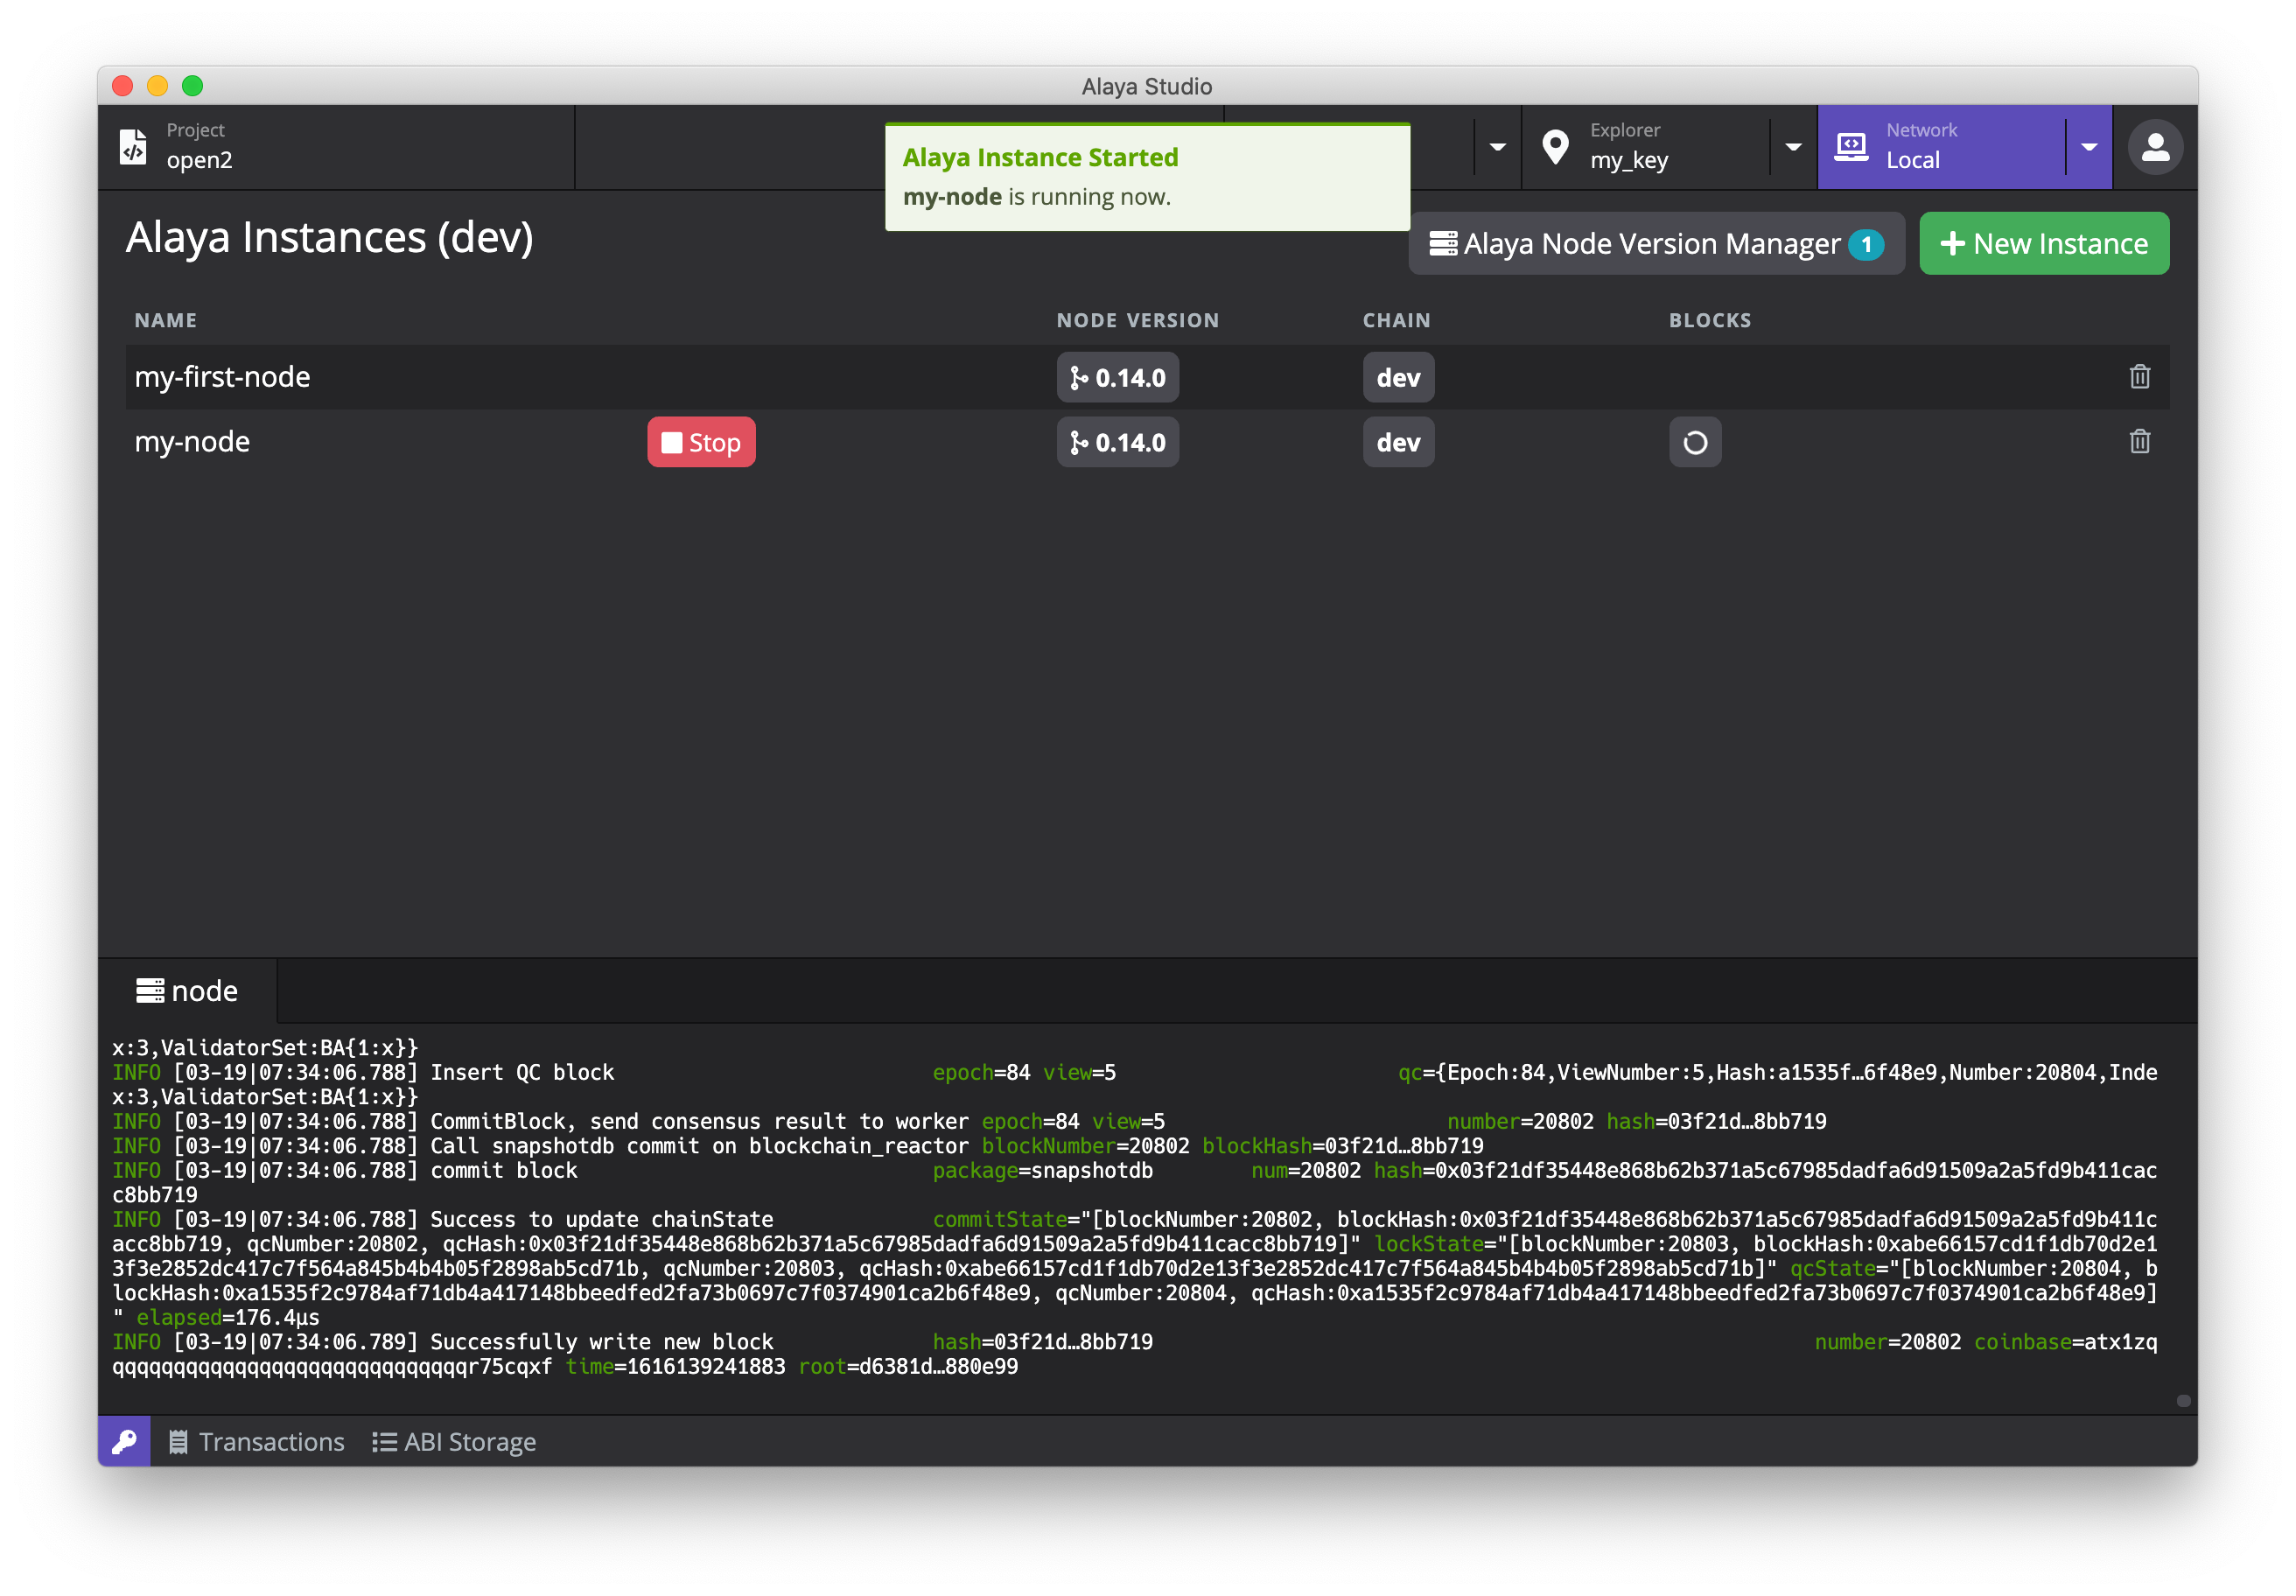
Click the Network tab at the top, and the main page will switch to the network manager where we can manage the local node version and node instance, including downloading and deleting the local node version, and creating, deleting and running node instances according to different versions.
Click the New Instance button in the upper right corner of the main page to open the pop-up window to create a new instance. Fill in the instance name and select the appropriate version. Click the Create button to create a node instance. It takes a long time, more than ten seconds in some cases, to create a node instance.
After it is created, the node instance will be shown in the instance list. Click the green Start button of the instance to start the local node. After the startup, you can check the node running log in the log viewer below.
Remote network#
In addition, PlatON Studio has the PlatON mainnet, testnet, and the connection between the Alaya mainnet and the testnet. Click the drop-down arrow next to the Network tab, you can directly select the network you want to use, and switch with one click.
Block explorer#
After successfully starting the local node or connecting to the remote network, click the Explorer tab at the top to open the block explorer. In the drop-down menu next to the Explorer tab, you can directly select the address saved in the key manager. Or, you can enter or paste the address you want to visit in the input box. After clicking Enter, we can see the balance, transaction records and other information of the corresponding address.
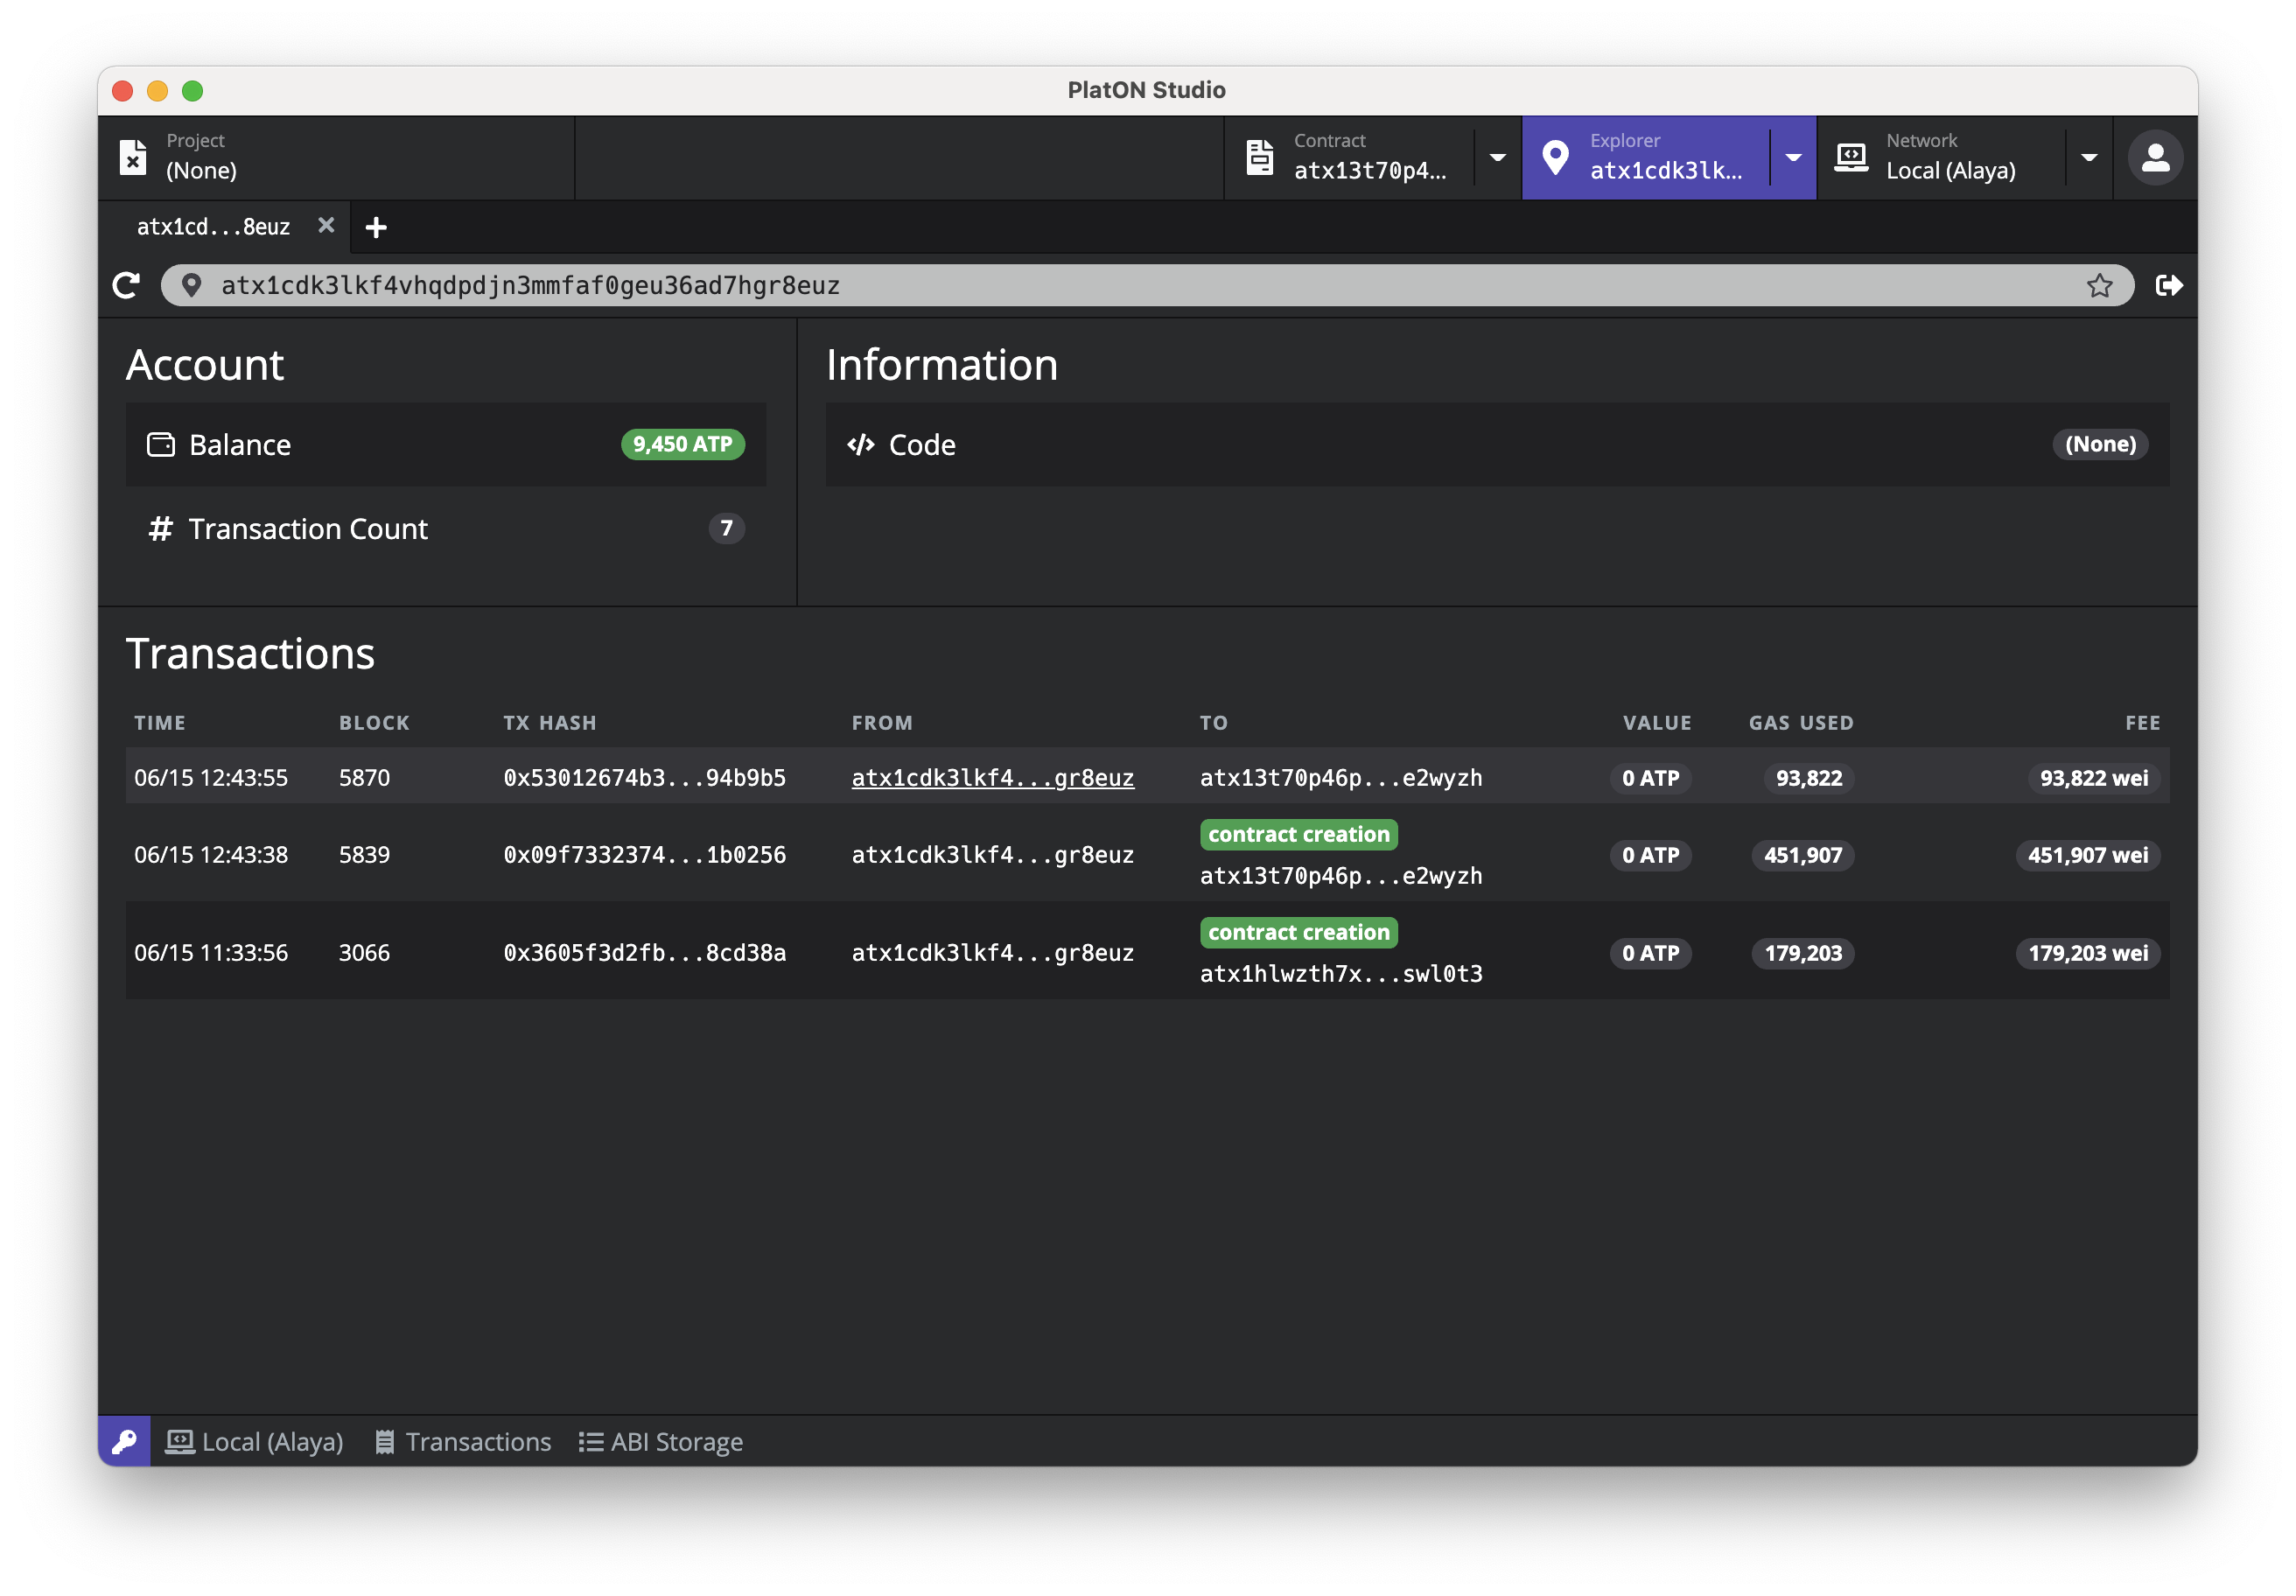
On the right side of the address bar are buttons for commonly used tools. For example, you can initiate a transfer after clicking the transfer button (of course, you need to have the private key of the current address). If you are currently connected to the Alaya testnet or PlatON testnet, there will be a Faucet button on the right side of the address bar. After clicking it, you can open the interface for applying for a test token.
Create a smart contract project#
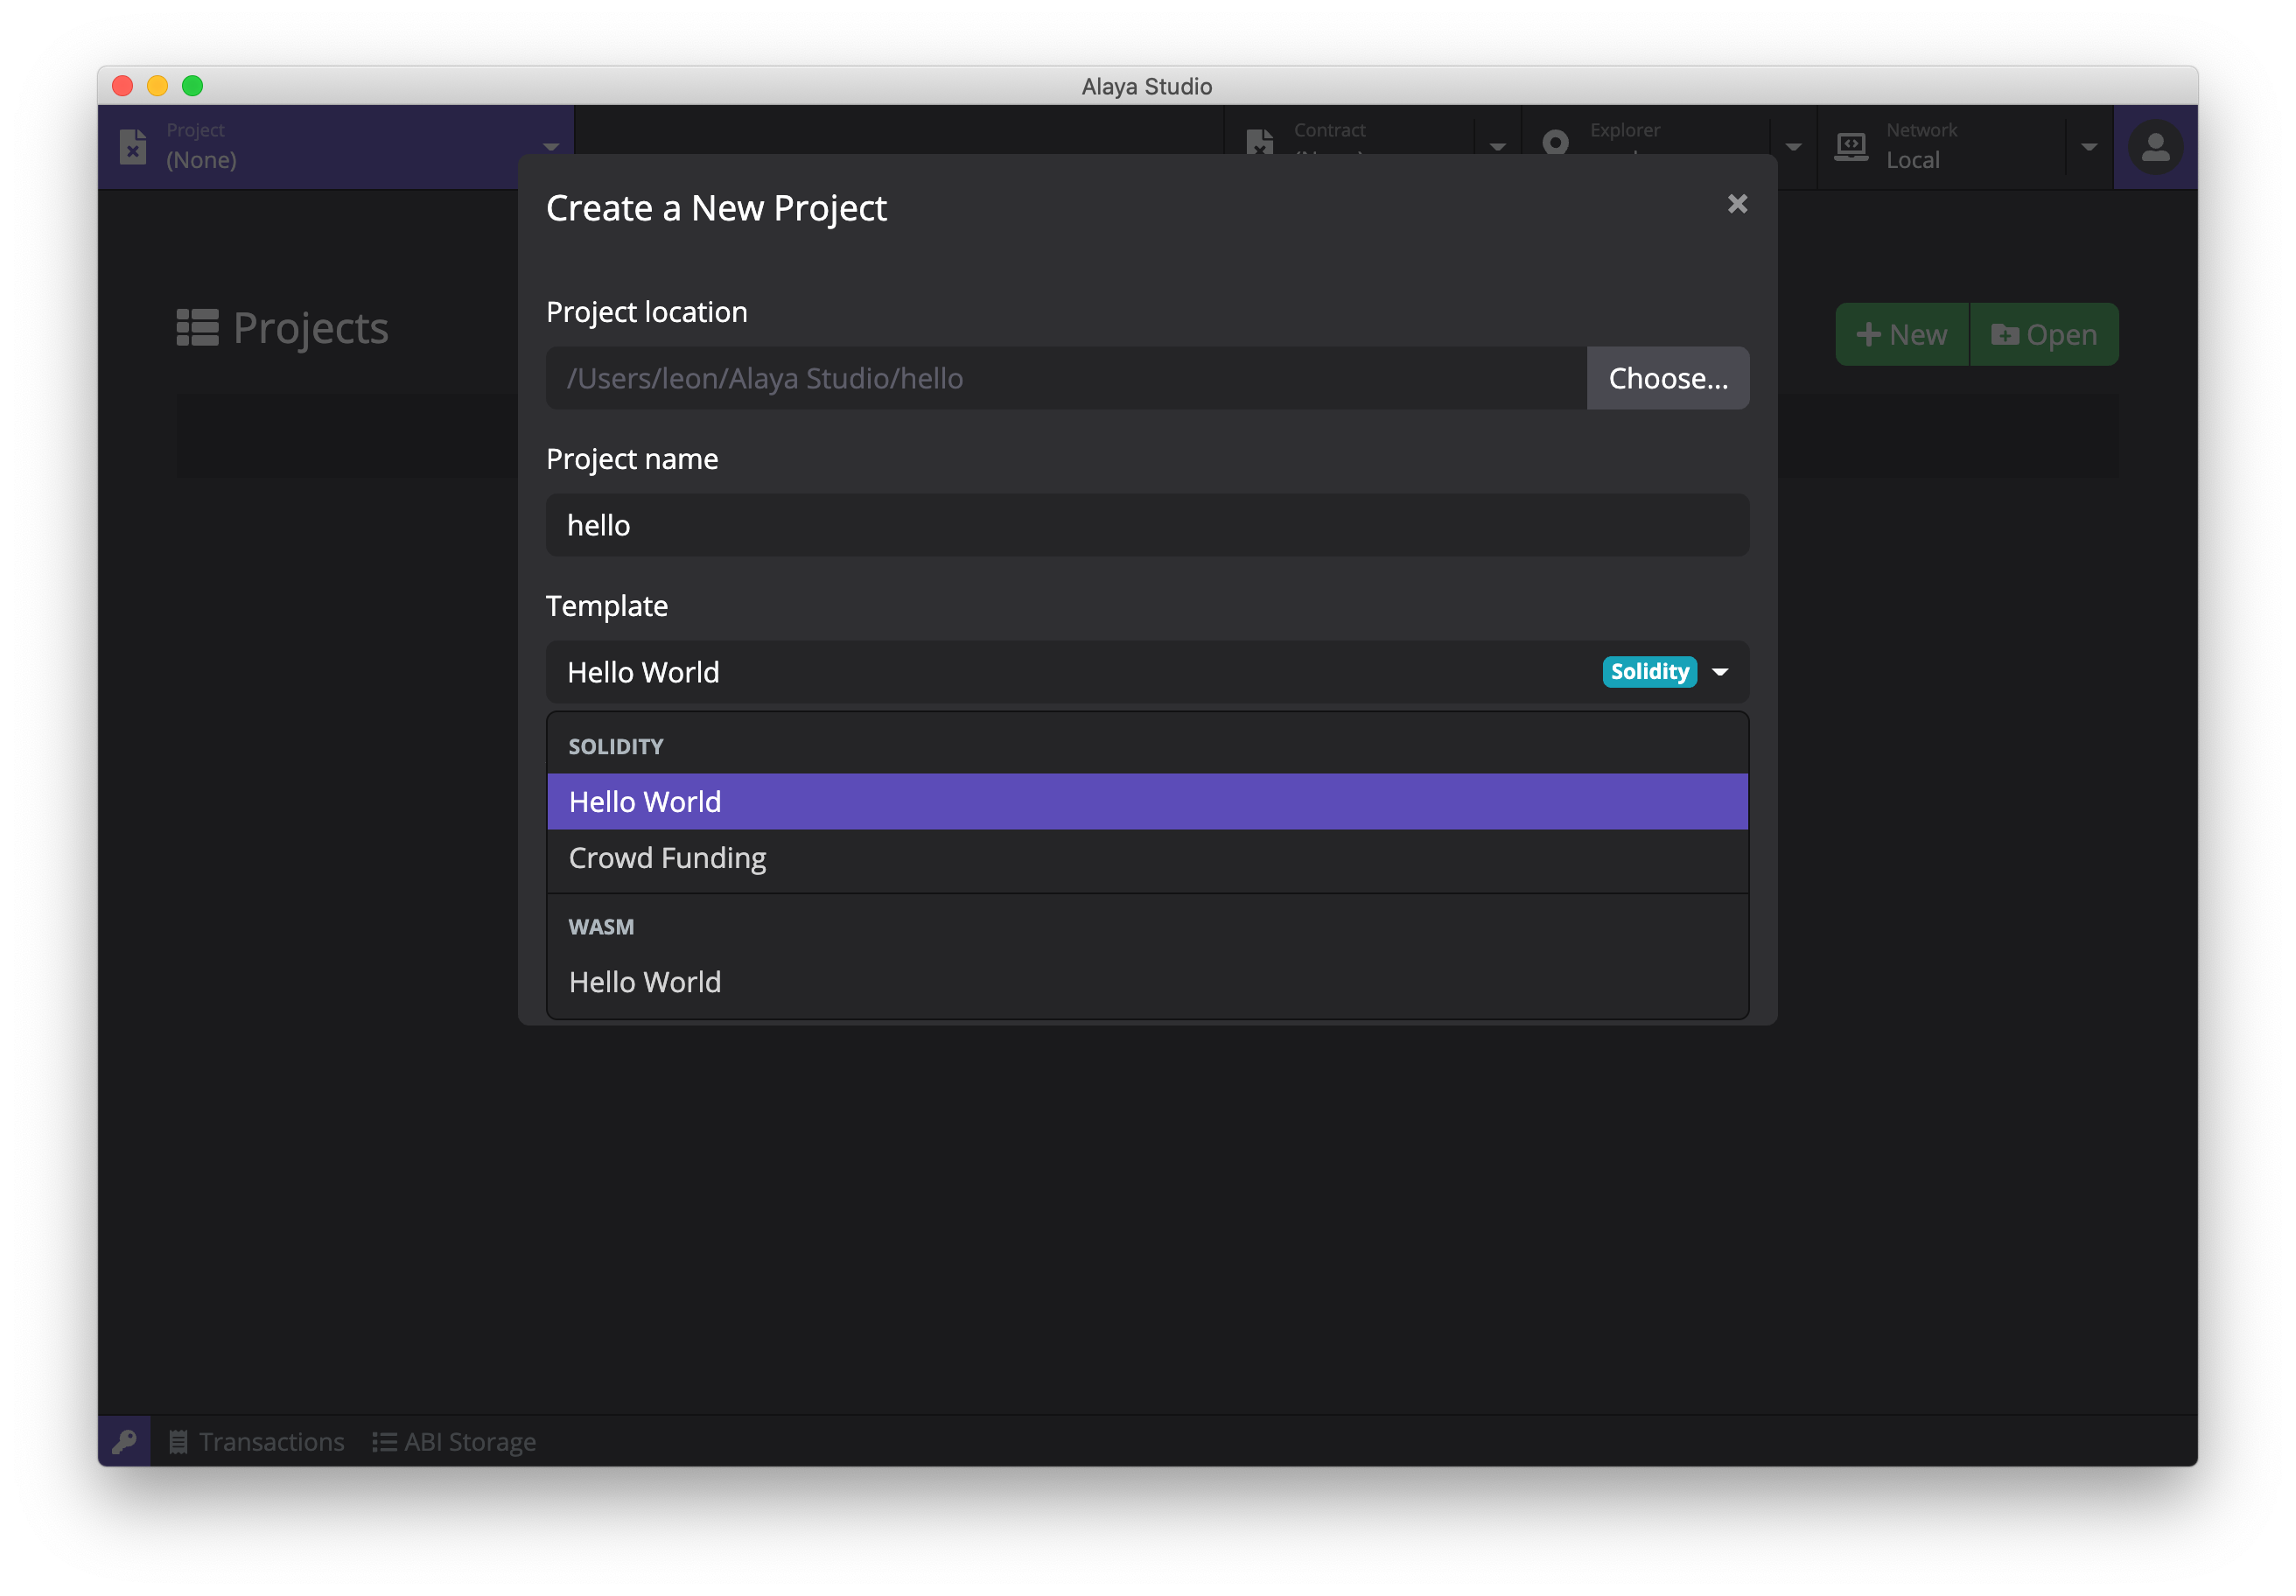
Click the Project tab at the top to switch to the contract project interface. Click the New button in the upper right corner of the page to open the project creation pop-up window, enter the project name and select the appropriate template. PlatON Studio has provided multiple templates:
- Hello World (Solidity): A simple smart contract based on Solidity;
- Crowd Funding (Solidity): A crowdfunding smart contract based on Solidity;
- Hello World (WASM): A simple smart contract based on C++.
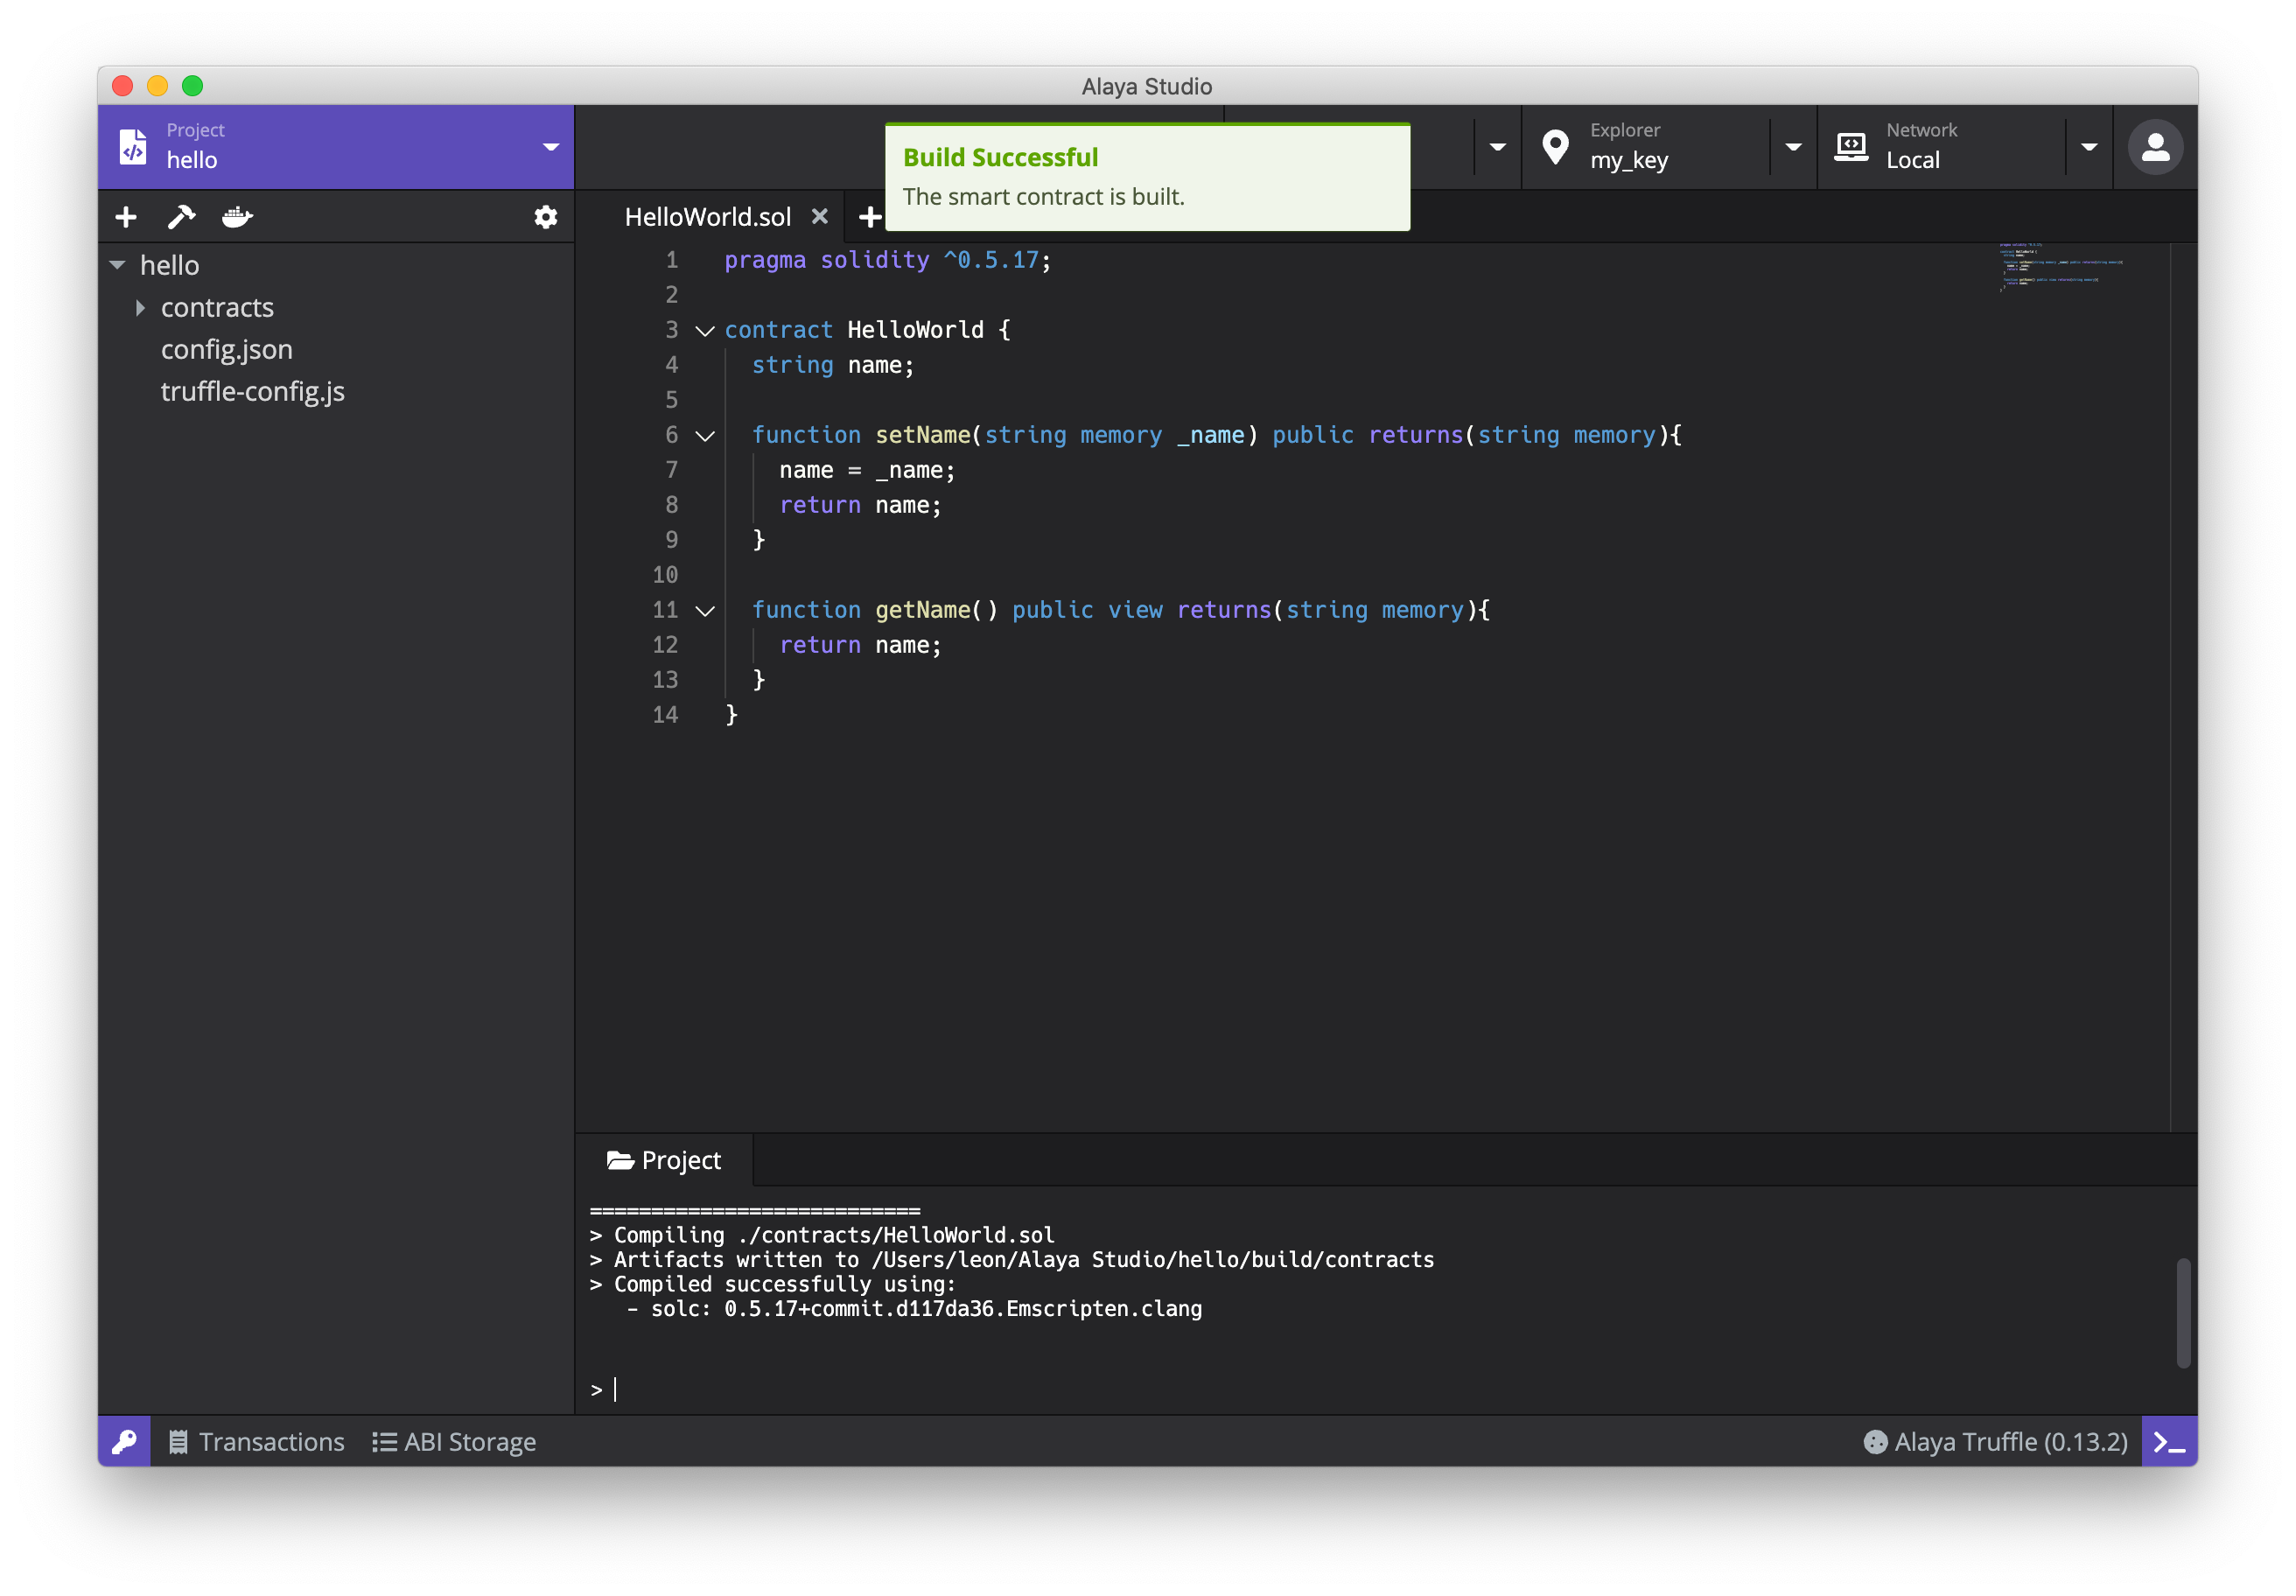
After the project is created, PlatON Studio will automatically open the newly created project in the project editor. The project editor is composed of several parts, including a file browser, a code editor, a toolbar, and a terminal.
Compile a smart contract#
Click the compile button (in a hammer shape) on the toolbar, and PlatON Studio will compile the project. You can view the compilation result through the terminal below. After compilation, the compiled JSON file will be generated in the build/contracts folder under the project directory. For the specific data format, please refer to solc documentation.
During the compilation process, you need to download Solc. If you're in the Chinese mainland, you may need to use a network proxy for compilation.
Deploy a smart contract#
Click the deployment button (in the boat shape) on the toolbar, and the deployment parameters window will be opened, where you can select the contract to be deployed, enter the parameters of the constructor, and select the signer of the deployment transaction.
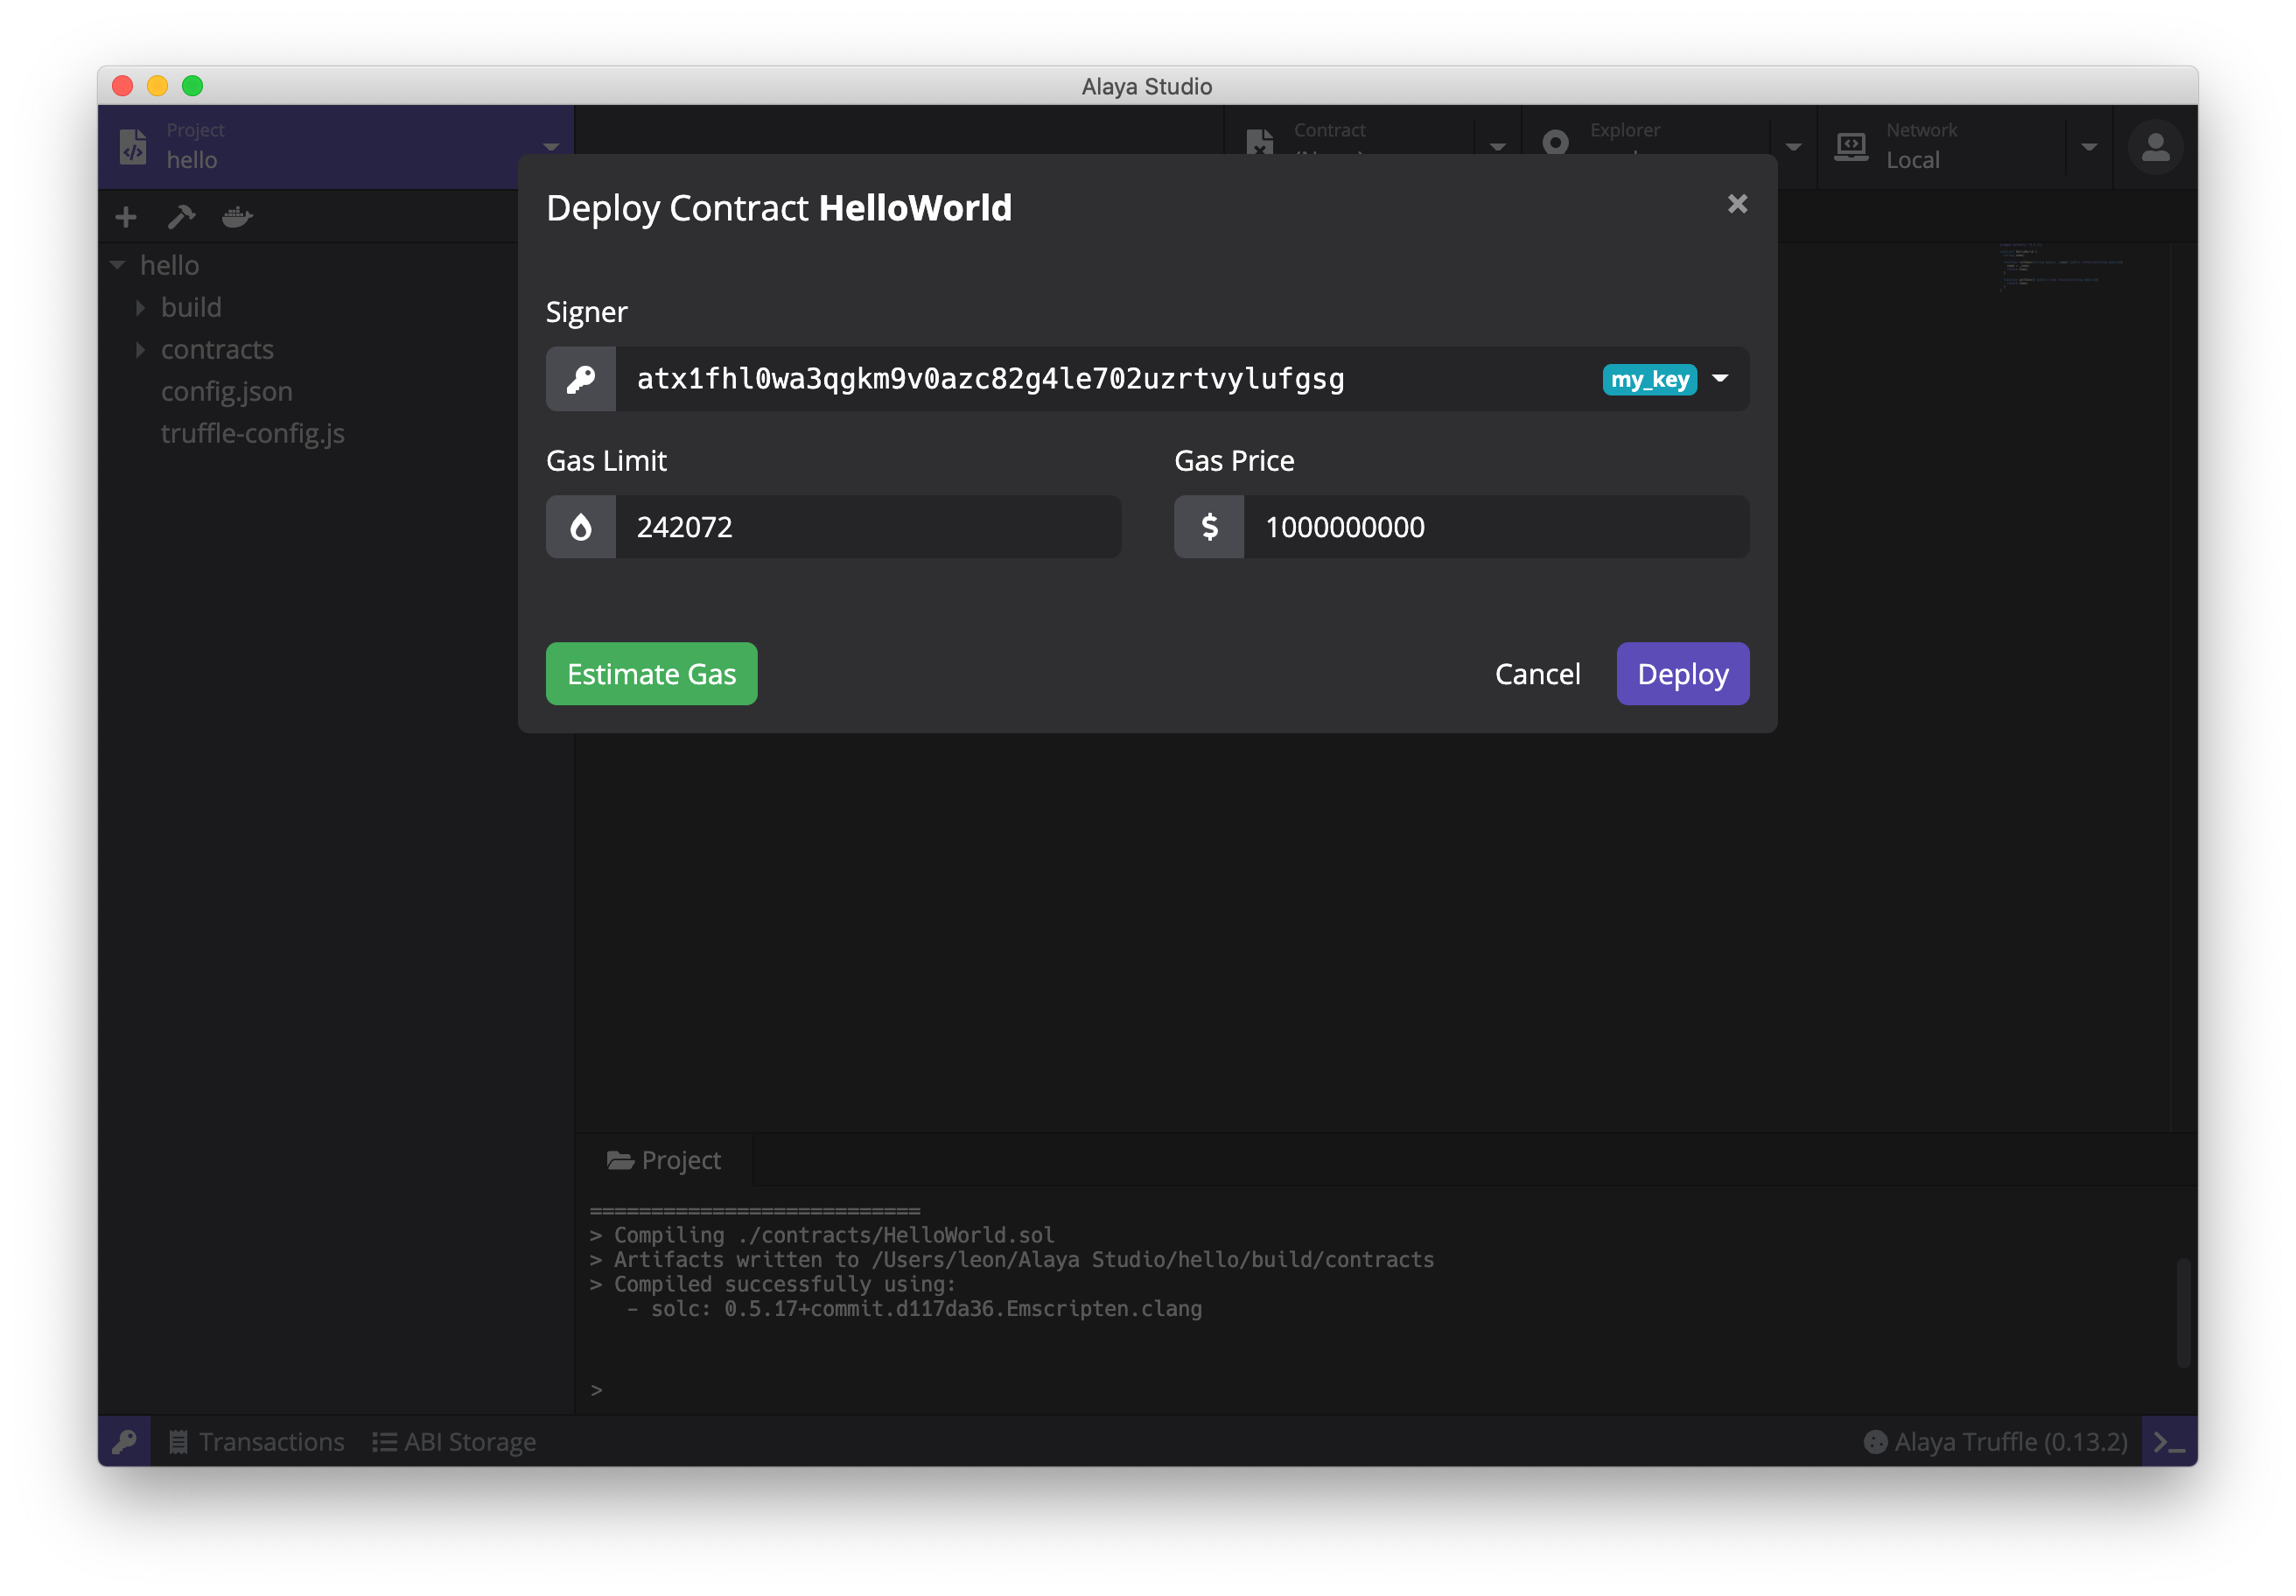
Before deployment, you can click the Estimate button to estimate the transaction fee (Gas and Gas Price) required for the deployment transaction, and then click the Deploy button to complete. Sometimes the estimated Gas is insufficient during deployment. If so, you can increase the Gas value and try again.
After the contract is successfully deployed, PlatON Studio will pop up the transaction details in a window which shows the result of contract deployment, including transaction hash, the address of the deployed contract, parameters, deployment transaction, receipt, ABI and other related data.
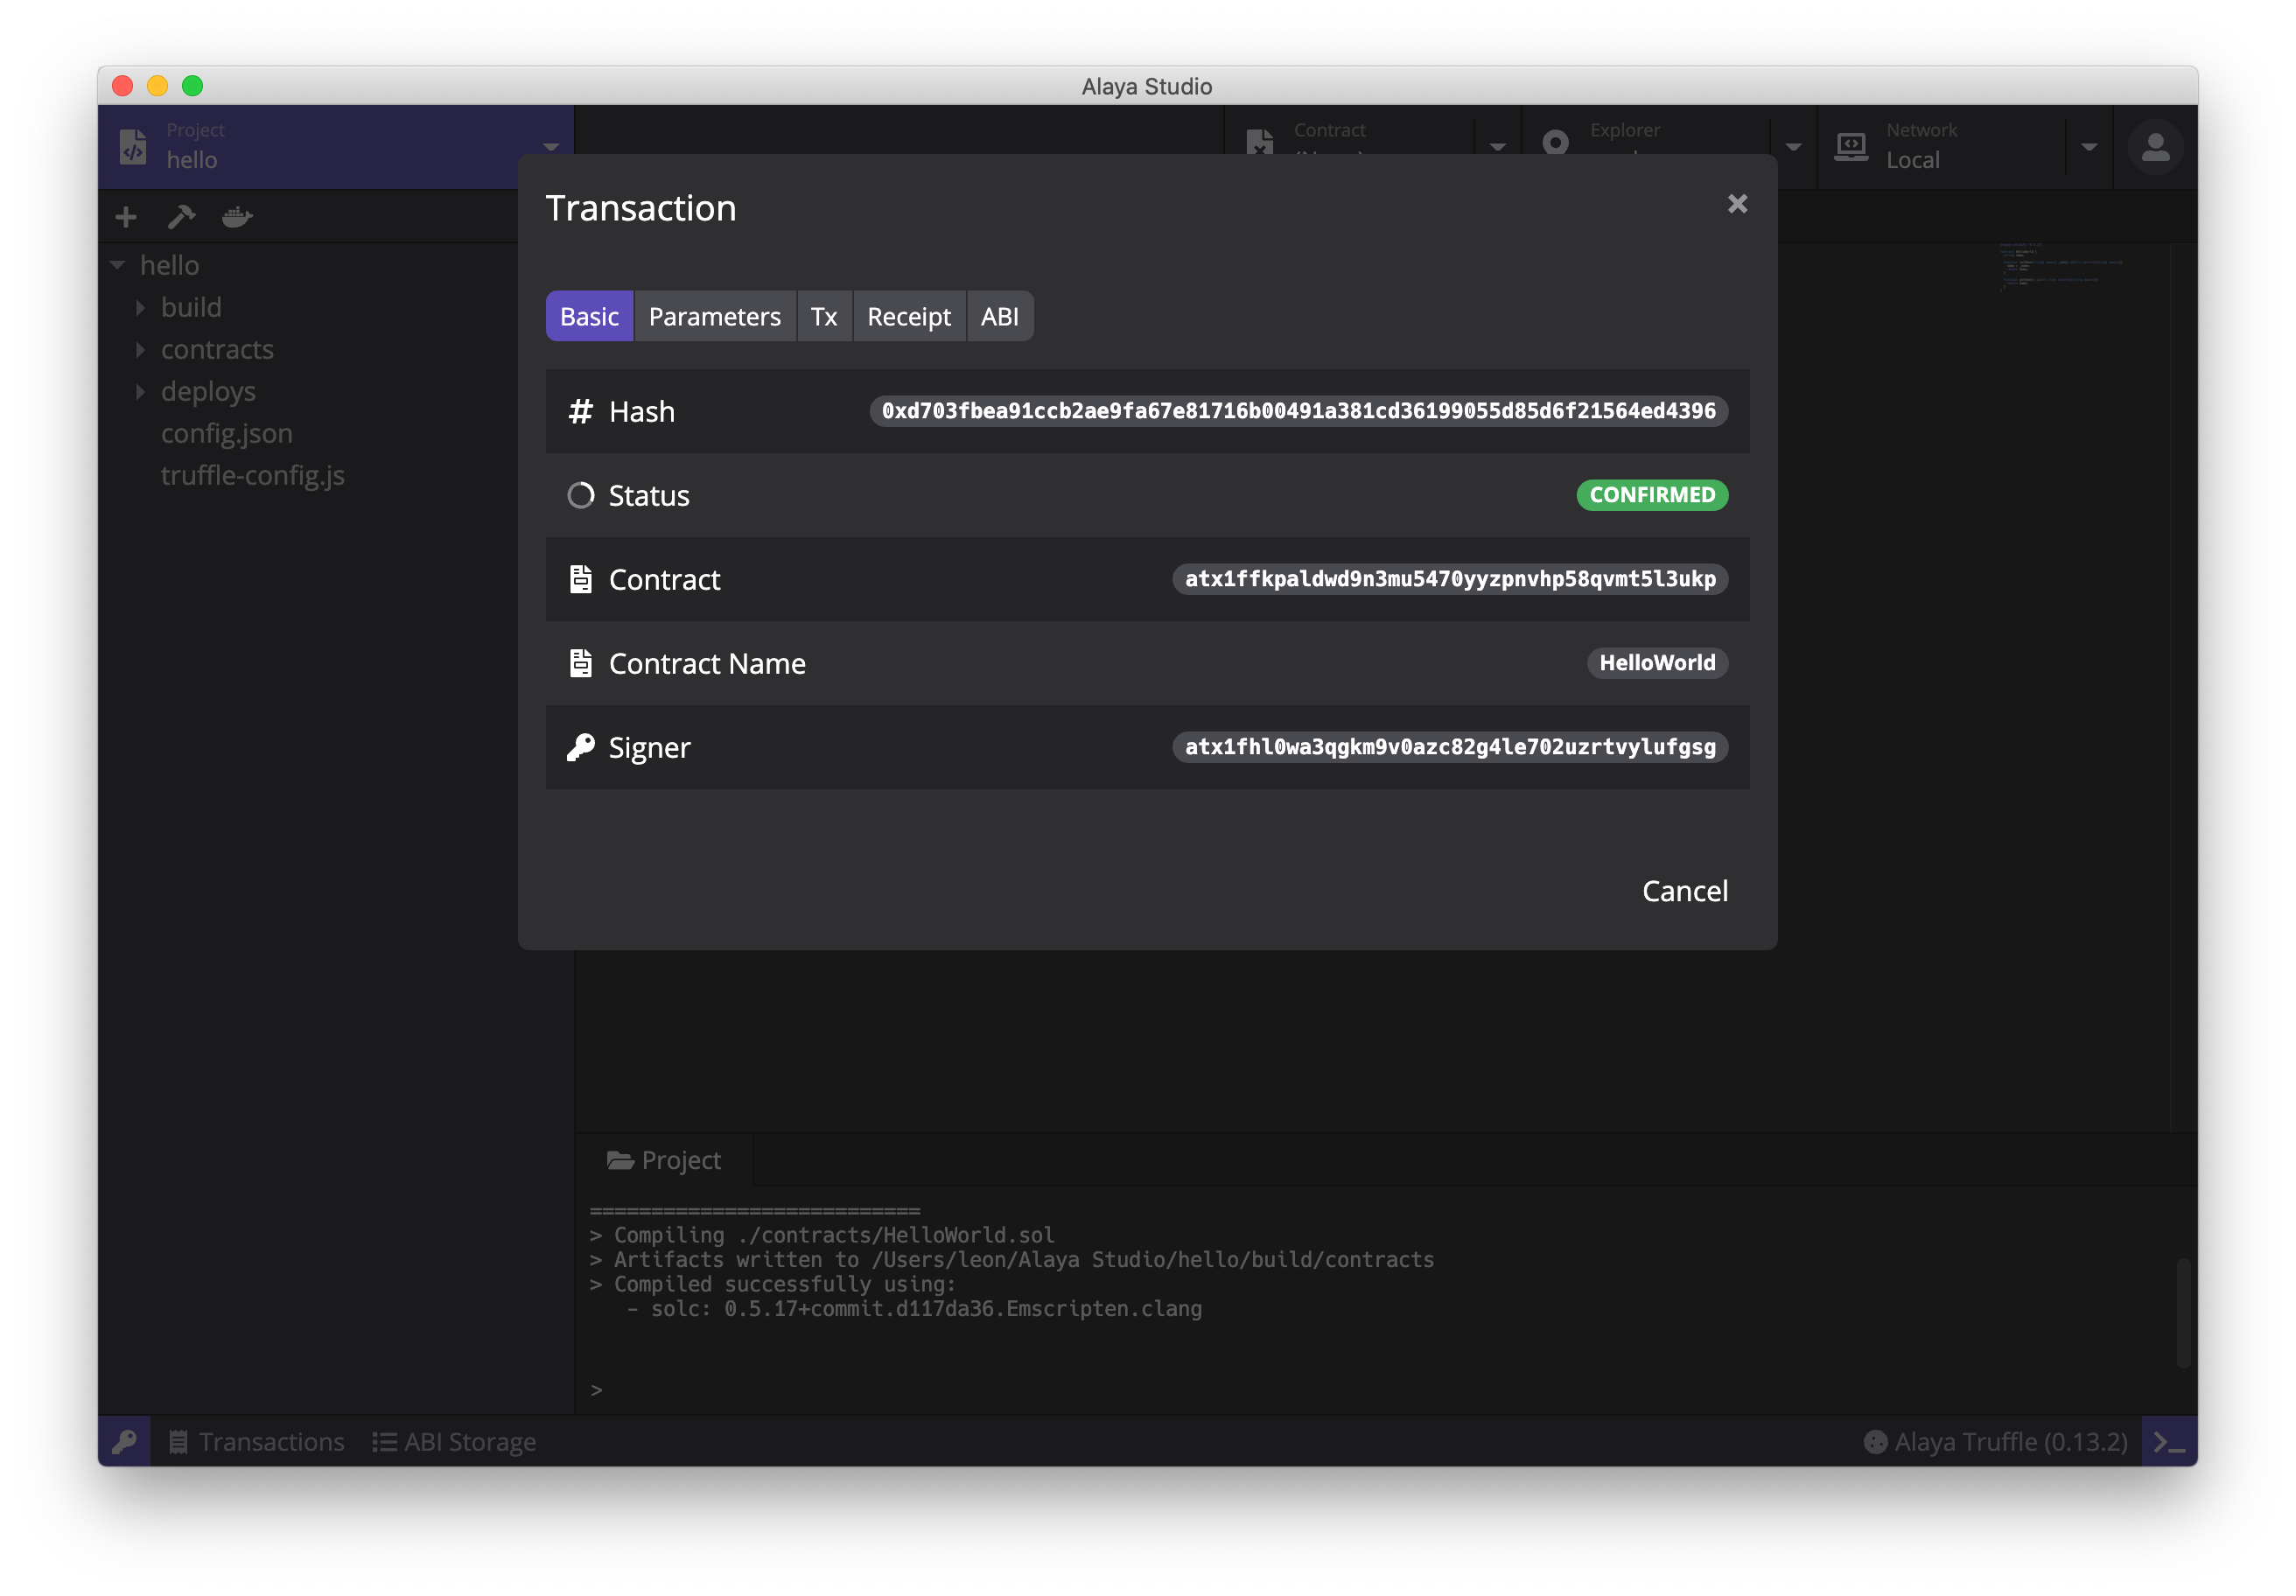
At the same time, you can also click Transactions in the bottom bar of PlatON Studio to see the deployment transaction just sent, query the execution state of the transaction (pending, mined or executed), or click on the transaction to open the pop-up window of transaction details again.
Contract browser#
After successfully deploying the smart contract, click the address next to Contract in the pop-up window of transaction details, and PlatON Studio will switch to the contract browser and automatically open the smart contract that has just been deployed. You can also click the Contract tab at the top to switch to the contract browser, and enter the contract address you want to open in the address bar. PlatON Studio supports opening multiple contracts at the same time, facilitating the debugging of multiple contracts.
The contract browser page is mainly divided into three parts:
- The left column is to call the writing method of the contract: Click the blue drop-down box and select the writing method that you want to call the contract;
- The middle column is to read the contract data: Click the blue drop-down box and select the reading method that you want to query the contract;
- The right column is to query the event of the contract. Click the blue drop-down box to select the event you want to query the contract.
PlatON Studio will automatically save the contract ABI after deploying the contract, and read the ABI data when reading the contract, which is used to generate the above writing method, reading method, event query, and their respective parameter forms (for more about the ABI usage, refer to ABI Storage).
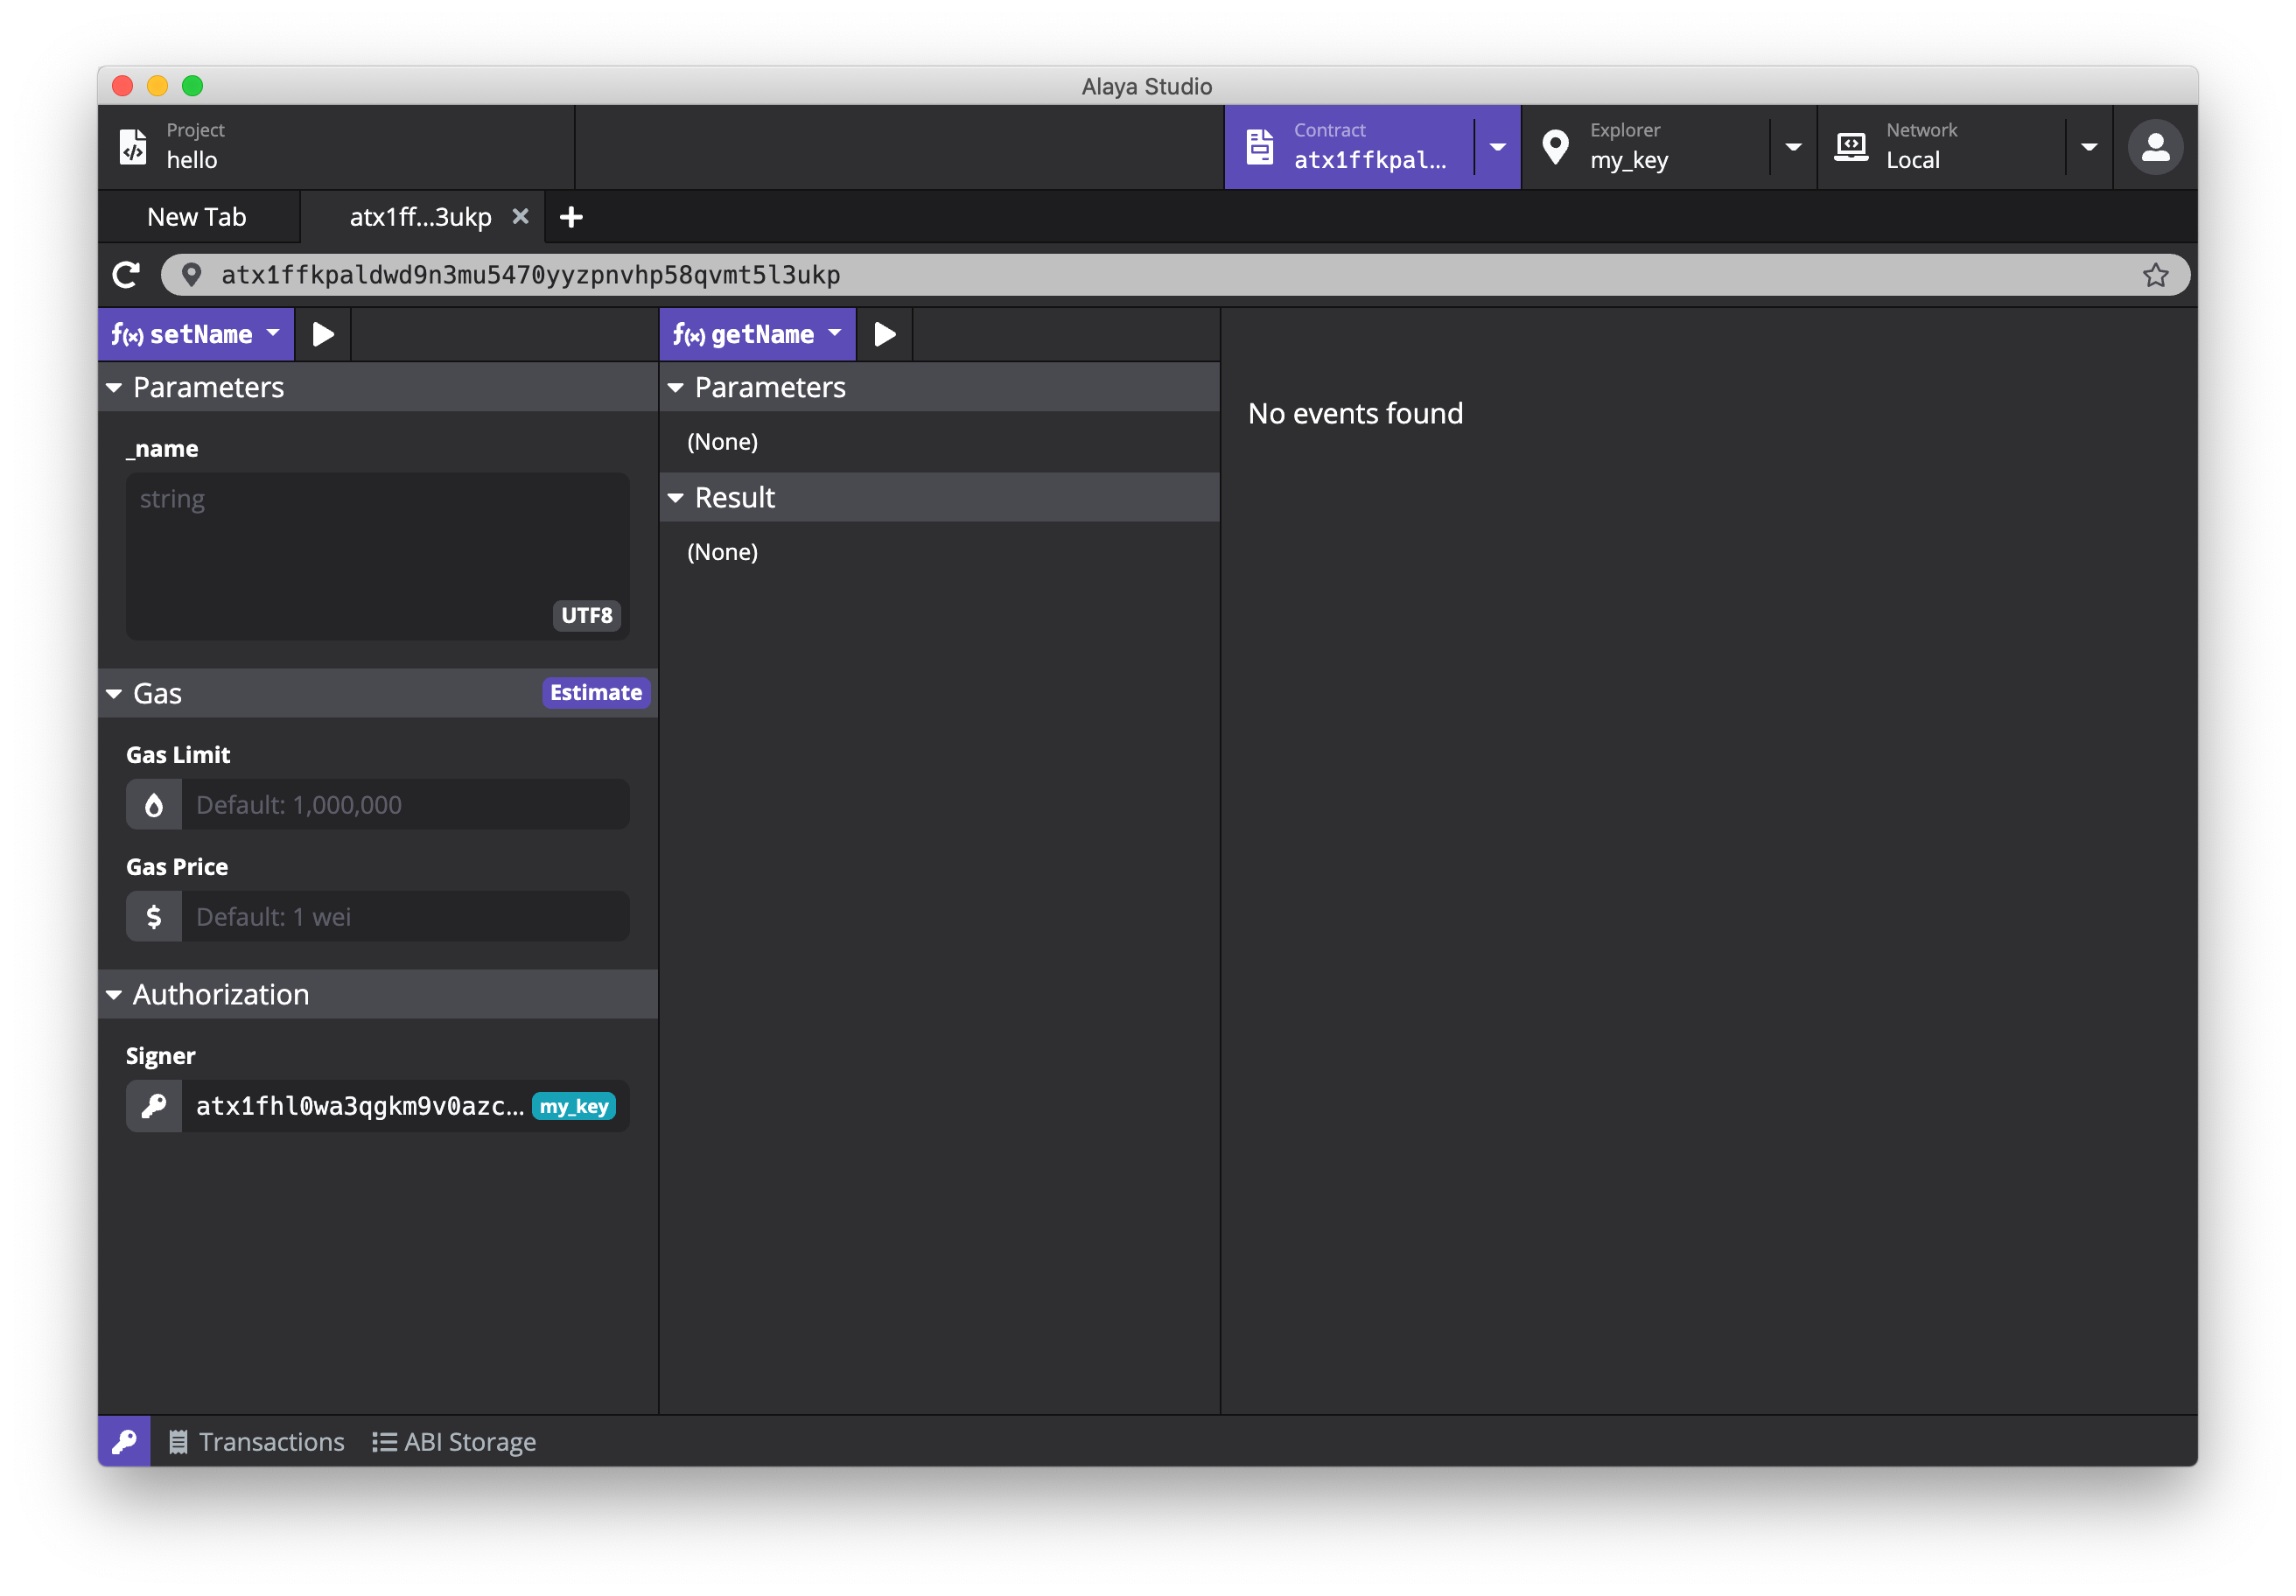
Next, we will use the just deployed HelloWorld contract to demonstrate how to use the writing method, reading method, and event query.
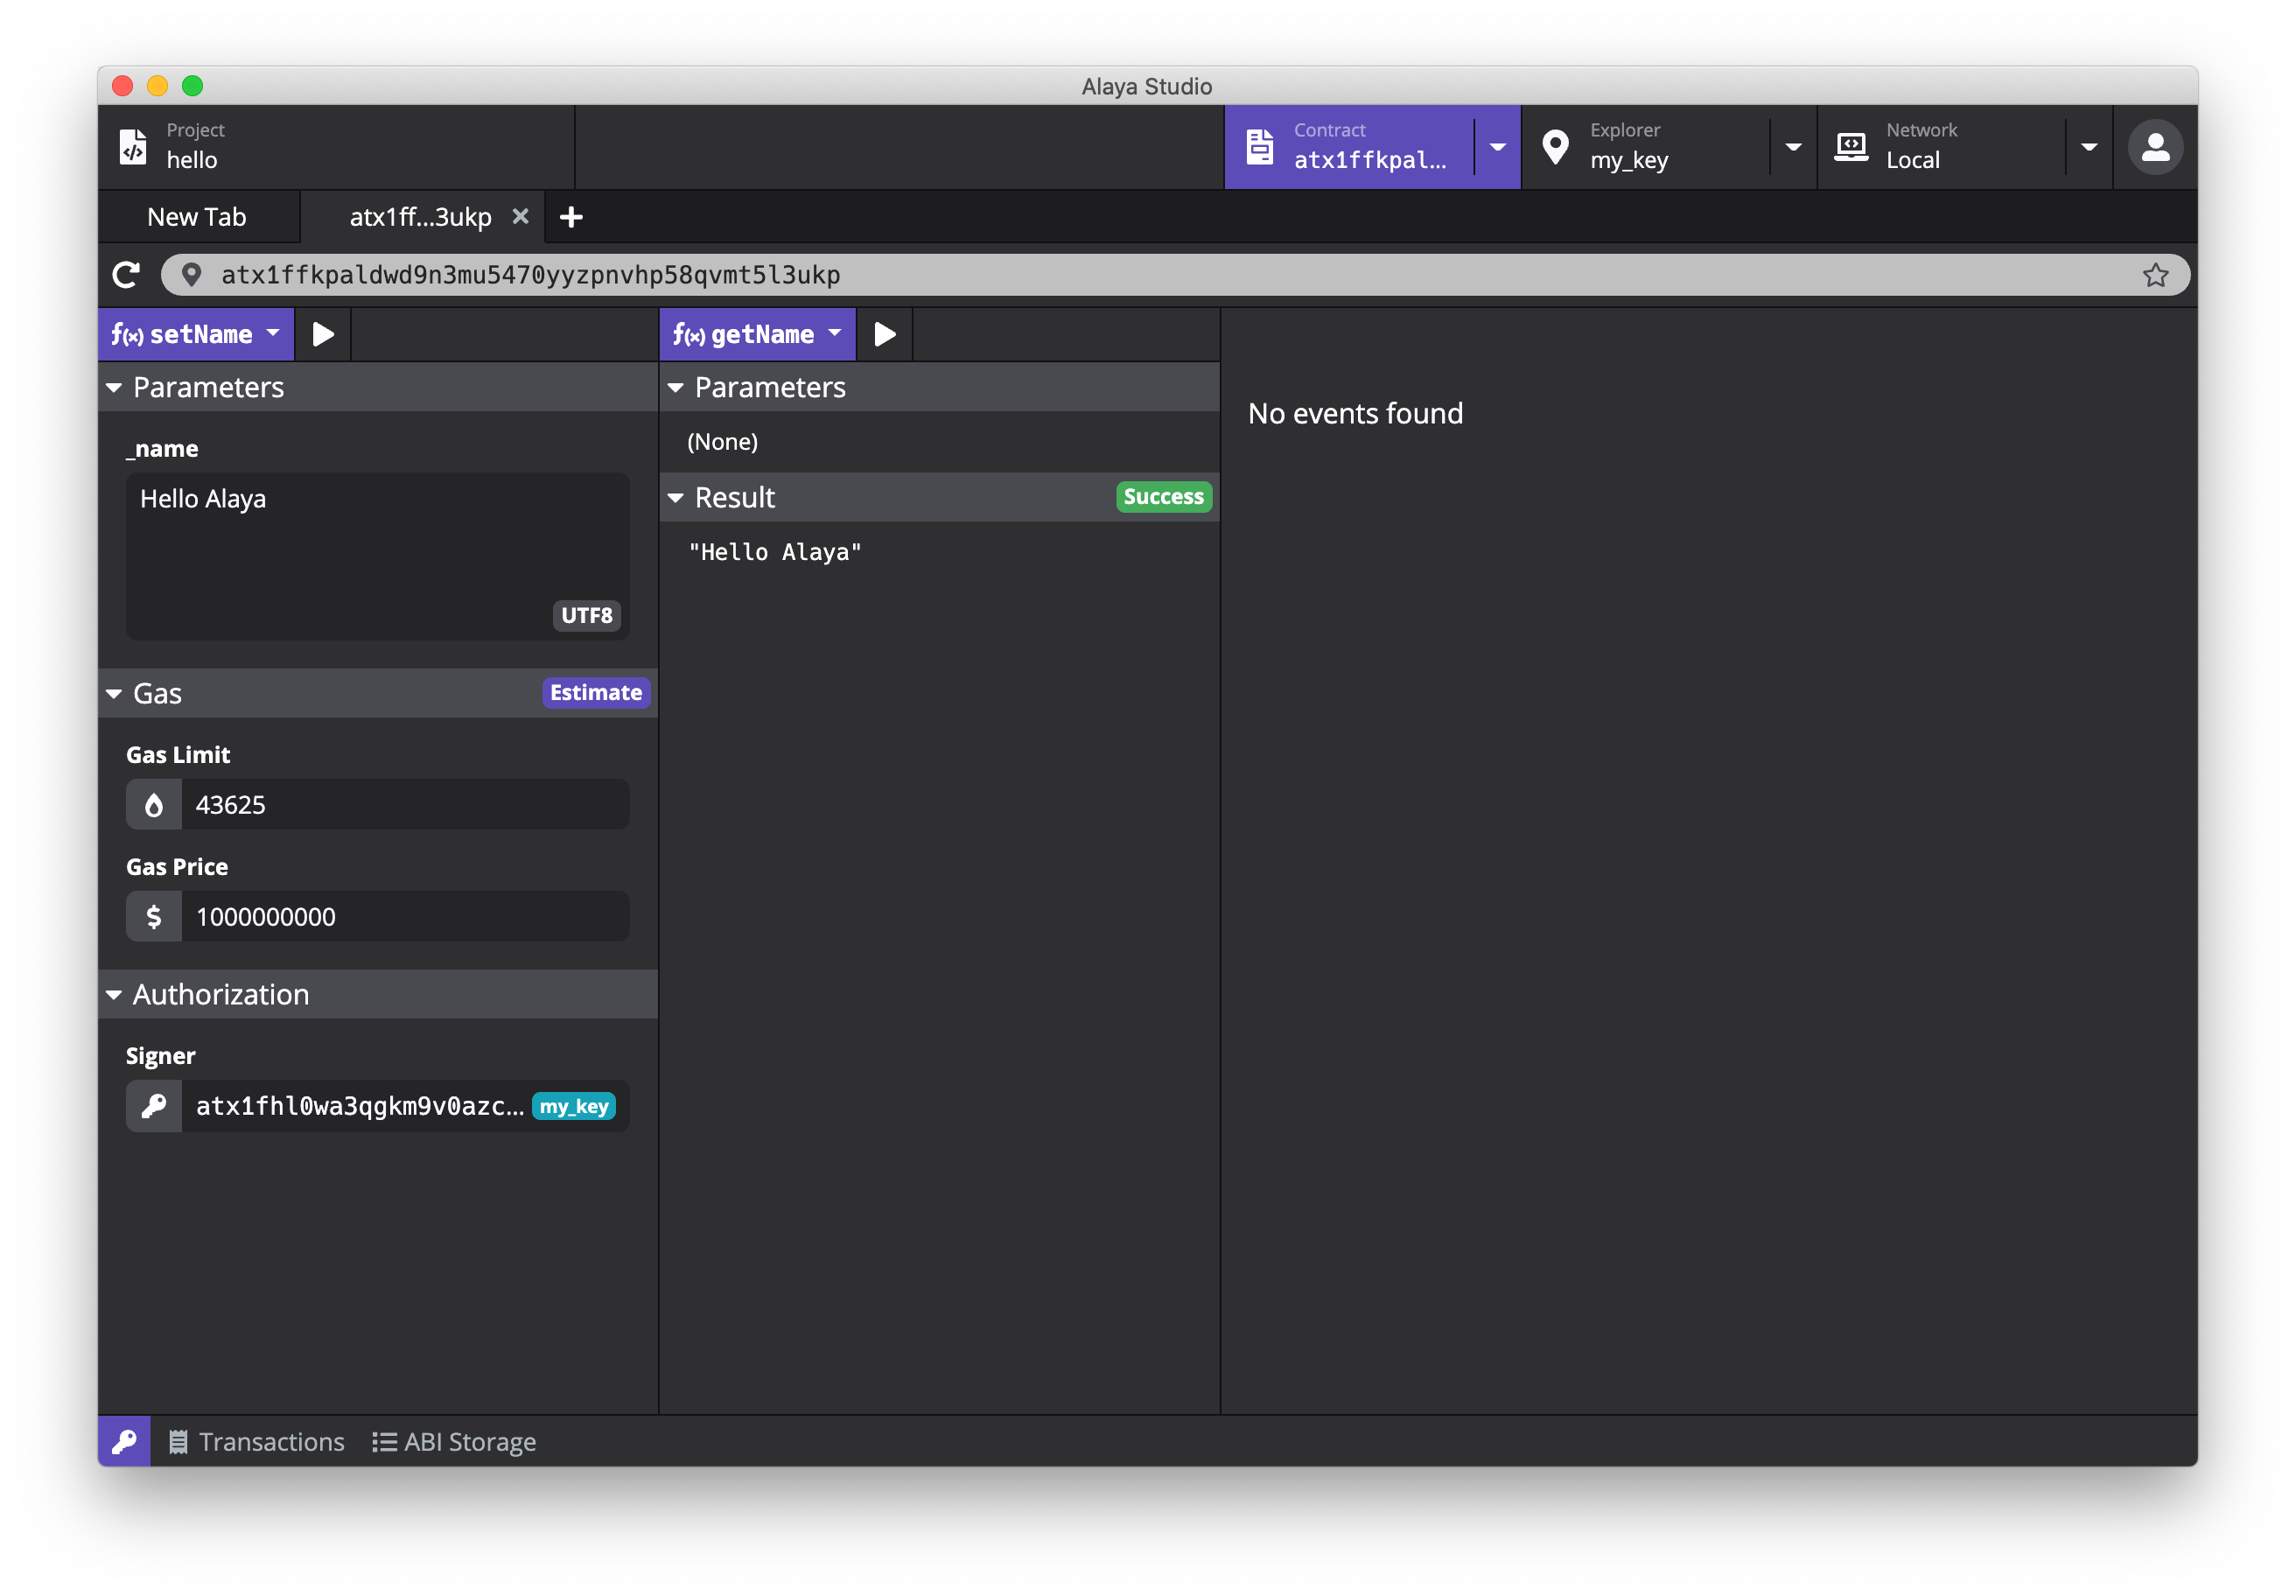
In the left column, select the setName method, and fill in the value of the _name parameter under Parameters, such as Hello Alaya. Click the estimate button, and PlatON Studio will automatically estimate the transaction fee required for this transaction. After selecting the address of the transaction signature in Authorization, click the execute button above to send the transaction calling the writing method. After the transaction is sent, it will also be synchronized to the Transactions list in the bottom bar, which is convenient for querying the transaction execution state or later querying transaction details (such as the address, method, parameter, and transaction data of the contract called).
The parameter input form of PlatON Studio supports various parameter formats of Solidity, including (u)int, address, string, bool, bytes, array, structure, etc.
In the middle column, select the getName method and click the execute button to execute the reading method. In the Result below, you can see that the query result is the just set Hello Alaya.
The contract does not set events (Events). If the operating contract has defined events, you can select the event you want to query in the right column, specify the query range (the most recent 10,000 by default), and then query. The results will be presented in the form of a table.
ABI storage#
When using the contract browser, PlatON Studio needs to generate the interface for reading and writing methods and query events based on the contract ABI. The ABI Storage in the bottom column is where these contract ABIs are saved. After the contract is successfully deployed, PlatON Studio will automatically save the ABI of the contract. In some cases, if you need to call other contracts (such as online contracts), you need to add the ABI of the contract to ABI Storage. This can be done by using the New button in ABI Storage.
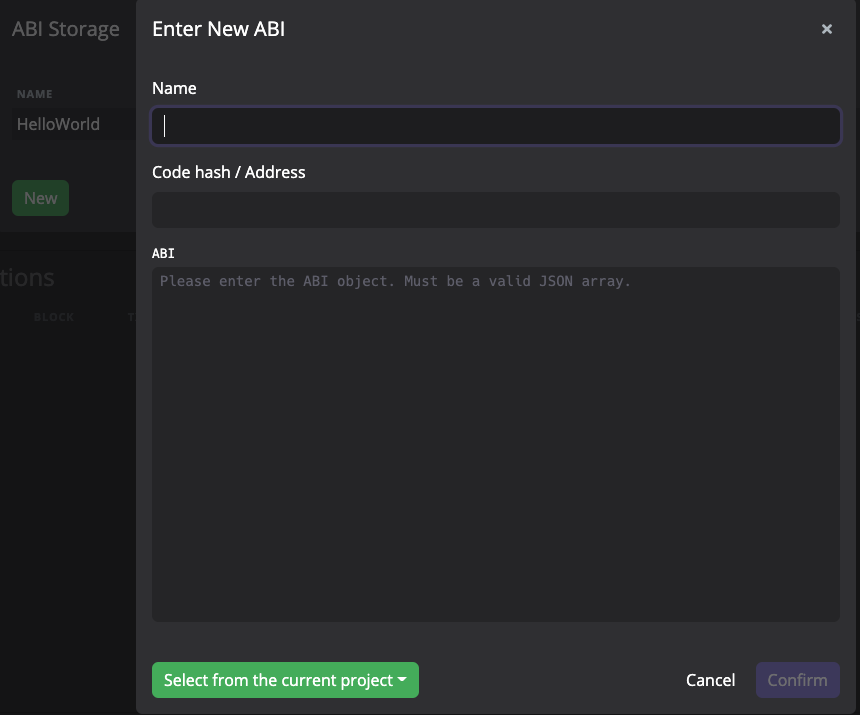
For ease of use, PlatON Studio will also automatically read the ABI of the compiled contract in the current project, which can be selected from the button in the lower left corner of the Enter New ABI pop-up window.
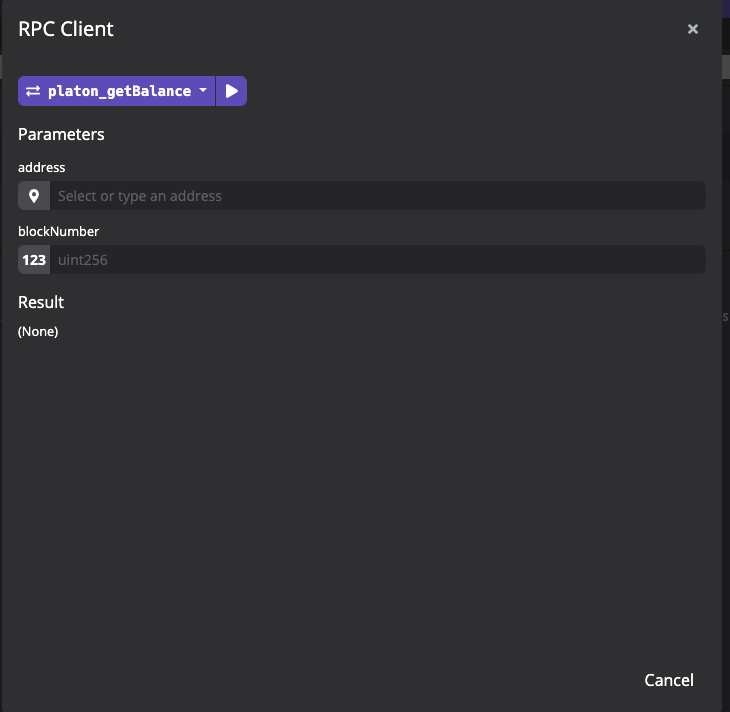
RPC Client#
PlatON Studio also provides the function of calling the PlatON/Alaya node RPC interface directly from the bottom layer. Click the network button in the bottom bar, select and open the RPC Client in the pop-up menu, and you can see all the RPC interfaces of the PlatON/Alaya node. For each RPC interface, PlatON Studio will also generate the corresponding parameter form. Fill in the data and click the run button to complete the call. Then you can view the returned data.